
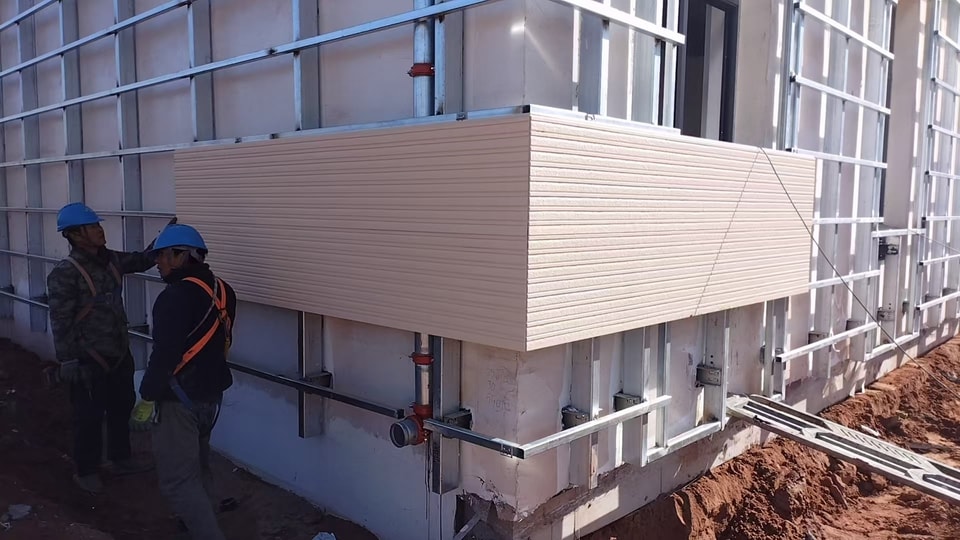
Fiber Cement Cladding Accessories: What Each Part Does
Fiber Cement Cladding Accessories: What Each Part Does
A fiber cement facade is sold as a panel and installed as a kit. The panel gets the attention in the brochure; five accessories decide whether the wall drains, whether the corners close, and whether water ever reaches the substrate. Buyers who price a project on square meters of panel alone find out at the first delivery, when the corner pieces are missing and the schedule is already fixed.
Here is what ships with our 3030 × 455 × 16 mm panel, what each part does, and what fails when it is left out.
The kit at a glance
Every fiber cement board installation uses the same six pieces, and they work as an installation system rather than a bag of parts. Five are fiber cement board accessories proper and one is a consumable. Every dimension below is the size we manufacture, because a corner 20 mm short of the module is a corner that gets cut on site.
Read the third column first. A quotation that lists only panels is an incomplete quotation, not a cheaper one: the profiles are made to match this panel rather than a local standard, so they cannot be bought locally at short notice.
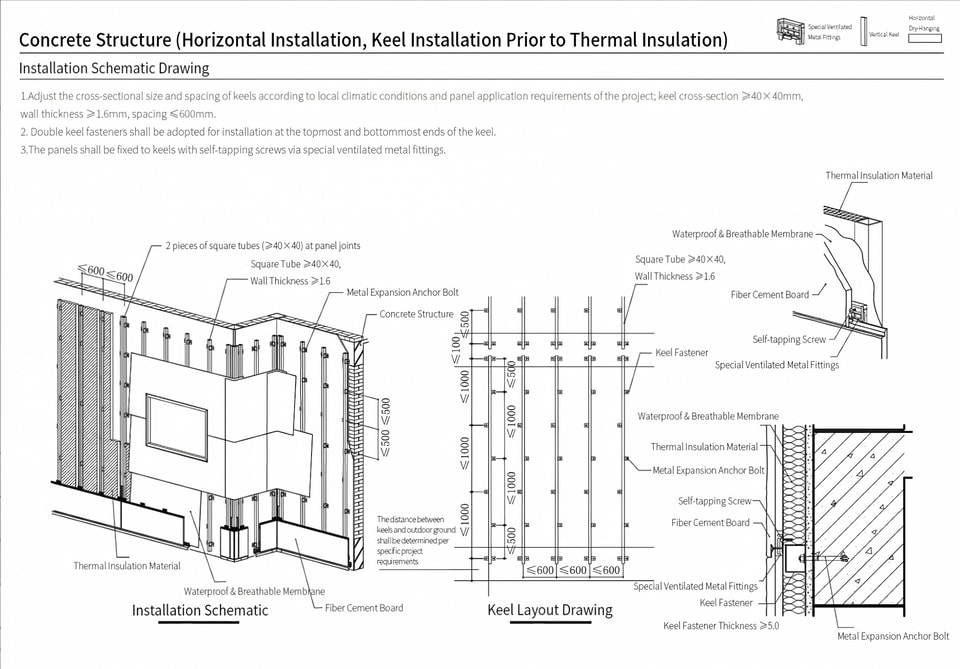
| Accessory | Specification | Where it sits |
|---|---|---|
| Wall corner | 455 mm × 70 / 90 / 110 mm | External corners |
| Snap joint | 70 × 50 mm | Horizontal panel joints |
| Dowel bar | 3,030 mm | Long joint runs, alignment |
| Apron flashing | 3,030 mm | Base of wall, above grade |
| Silicone adhesive | 600 mL cartridge | Cut edges, penetrations, terminations |
| Fixing screws | Metal-fitting grade | Through clips into subframe |
Wall corner, 455 mm with a 70, 90 or 110 mm return
The corner is 455 mm on its long face, which equals the panel width. One corner covers exactly one module, so a building with four external corners needs four pieces per course, not a length of trim cut on site.
The return is the other dimension, and it comes in three depths: 70, 90 and 110 mm. That is not a cosmetic range. The return has to reach across the panel edge, the cavity, the subframe and the insulation to land on the substrate, so the depth is chosen by your wall build-up, not by the look of the corner. Order a 70 mm return for a shallow build-up and it stops short of the substrate; order a 110 mm return for a thin wall and it will not sit flat.
Tell us the total build-up from the structural face to the panel back, and we match the return. The three depths cover most ventilated facades, and the choice has to be made before production, because the return cannot be adjusted after the crate lands.
The corner also closes the cut edges. Without it, the installer miter-cuts two panels and butts them, leaving an edge with no factory coating that absorbs water faster than the face and marks first. Corners carry the visual load too: a machined corner reads as a detail, a site-cut butt joint reads as a mistake, at eye level, on the most visible part of the wall.
Snap joint, 70 × 50 mm
The snap joint sits in the horizontal line between two courses. It holds the panel edges in one plane so the facade reads flat rather than as a stack of boards, and it keeps the joint open by a consistent amount along its length.
That second job matters more than it sounds. Our panel moves about 1.5 mm over its 3,030 mm length as moisture content changes, and a joint sealed tight at one end will crack at the tight end within a season. The joint has to be a designed gap, not whatever the installer left.
At 70 × 50 mm the clip is small enough to disappear into a 50 mm deep joint. Check that at sample stage rather than on the wall: hold the clip against the textured face and look at it from three metres. Snap joints are also the accessory most often short-shipped, because they cost little each and the joint count on a two-storey elevation runs into the hundreds.
Dowel bar, 3,030 mm
The dowel bar runs along a joint line and holds panel edges in alignment over several modules. At 3,030 mm it matches the panel length exactly, so a bar splice lands on a panel joint every third module.
That coincidence is worth planning instead of discovering. Where a bar joint and a panel joint fall on the same line, they behave as one movement point: the detail has to carry the panel movement of about 1.5 mm over 3,030 mm and the bar splice at the same place, without pinching the snap joint. Mark the bar splices on the wall before the first course goes up, and where the layout allows, start the first bar half a module in from the corner so no two splices stack against a corner return.
The arithmetic matters on a long run. Three bars reach 9,090 mm, so a 10 m elevation takes four, with the last one cut to about 910 mm plus the overlap you are detailing.
Cut it square and deburr it on site. A burr on a profile pressed against a coated panel face will mark the coating before handover, and on a light texture the mark does not come out. Fasten at the spacing on the layout drawing: two fixings at the ends of a 3,030 mm profile let the middle deflect.
Apron flashing, 3,030 mm
The apron flashing, sometimes called a base baffle or foundation water baffle, closes the bottom of the cavity. It is the most commonly omitted accessory on a ventilated facade and the one whose absence does the most damage.
A ventilated facade works because the cavity behind the panel drains and vents. The apron flashing is what stops water running up the wall from the ground, splashing off paving, or pooling at the base from entering that cavity from below.
Without it, the bottom course sits above a wet ledge and the substrate behind it stays damp. The symptom appears two metres up the wall as efflorescence or a tide mark, which is why the cause gets missed; tracing efflorescence back to its source covers that diagnosis. Install it before the first course, upstand behind the panel, front lip clear of the wall face. Retrofitting means removing panels.
Silicone adhesive, 600 mL
Silicone here is a detail material, not a sealant for the whole facade. Use it on cut edges before they are concealed, around penetrations such as pipes and brackets, and where a panel meets a different material. Do not run a bead along every horizontal joint to make the wall watertight: a sealed joint stops the cavity venting, traps moisture and turns a drained facade into a wall that stays wet.
Specify a neutral-cure silicone rather than an acid-cure one. Acid-cure products can attack a factory coating at the bond line, and the failure shows up months later as a dull ring around a penetration, long after the tube has been binned. Match the colour, or choose one that reads as shadow: a white bead on a wood-grain board is visible from the street.
One 600 mL cartridge goes further than most installers expect on cut edges alone, and far less far once someone starts sealing joints with it. If the site is ordering cartridges by the box, the joints are being sealed and the cavity is being closed.
How much of each, for a real wall
Take a 10 × 10 m elevation, 100 m², with the subframe rails at 500 mm centres and the panels laid horizontally.
One panel covers 1.379 m², so the elevation needs 73 panels. The 455 mm edge sets the course height, so 10
Contact Us