
Efflorescence on Fiber Cement Cladding: Causes and Fixes
Efflorescence on Fiber Cement Cladding: Causes and Fixes White bloom on fiber cement cladding is efflorescence: soluble salts drawn to the surface by water, then left behind as a white deposit when the water evaporates. It is not a coating failure and it is not mould. Most new fiber cement facades show some in their first wet season and then stop, because the free alkali near the surface has been used up. Bloom that keeps returning to the same elevation, year after year, is a different problem. Water is finding a path into the wall, and the white powder is the symptom, not the fault. What efflorescence actually is Cement-based boards contain calcium hydroxide and soluble alkalis. They are part of what makes the board strong and alkaline enough to protect the reinforcement, and they are also what makes efflorescence possible. Water entering the pore structure dissolves those salts. As the water migrates outward and evaporates at the surface, it leaves the salts behind. At the face, calcium hydroxide reacts with carbon dioxide in the air to form calcium carbonate — the white, powdery or slightly crusty deposit you see. It shows up where evaporation happens fastest: along joint edges, at cut board edges, on the bottom course, and anywhere the face dries first after rain. Those are the evaporative edges, and they are exactly where you would predict a salt deposit to appear. Two lookalikes are worth ruling out before you treat anything. Mould is green, grey or black, grows in shaded damp areas, and smears when wiped. Chalking is a uniform white haze across the whole face, comes from the coating breaking down under UV, and wipes off as powder with no crust. Efflorescence is patchy, crystalline, and concentrated at edges and joints. Why fiber cement shows it more than brick or stone The panel absorbs up to 16.5% moisture by weight at saturation. That is normal for fiber cement, and it is the same property that lets the material buffer humidity rather than trap it — but it means water has a short, easy path. A 16 mm panel is thin: water entering at an edge or a fixing has only a few millimetres to travel before it reaches the face and evaporates. Brick and stone are thicker and denser, so their salts stay buried rather than bloom on the face. The factory coating — primer, topcoat, matte protective layer — slows uptake and protects the finish, but it is deliberately breathable. An impermeable skin on a cement board traps vapour behind the coating and blisters instead. The coating manages the rate of movement; it does not stop it. Which is why the cavity matters more than the coating. In a dry-hung, ventilated facade the panel dries from both faces and bloom is a one-off. Where the base is buried or the joints are sealed, the panel stays wet and the bloom becomes chronic. Diagnose the source in four checks Before cleaning anything, find out why water is arriving. Four faults account for most recurring cases. Check What you see What to do Base inlet blocked by paving, soil or planting Bloom concentrated on the bottom two courses Restore the clearance at the baffle; the cavity must breathe Sealant run into the open joints Bloom along horizontal joints, worst just under each joint Remove the sealant and reinstate an open joint Missing head flashing or sill end dams Bloom under windows and at jambs, in vertical streaks Rebuild the flashing with end dams and correct upstands Barrier laps or penetrations not sealed Patchy bloom unrelated to joints or geometry Repair the water-resistive barrier and re-tape penetrations If none of the four fits, test whether it is efflorescence at all. Take a small sample, add a few drops of dilute acid on a hidden area: efflorescence fizzes and dissolves, mould does not, and chalking just smears. How to remove it without damaging the coating Start dry. A stiff nylon brush removes the loose deposit without wetting the panel, and on a light bloom that is often the whole job. If brushing is not enough, wash with clean water at low pressure, working from the top down and rinsing as you go. Do not use a high-pressure jet near joints: it drives water past the panel and into the cavity, which is the mechanism that created the problem. For heavier deposits, use a mild acid — dilute white vinegar or a proprietary efflorescence remover — with three rules. Pre-wet the panel so the acid works on the surface rather than soaking in. Keep the dwell time short and never let it dry on the face. Rinse thoroughly and repeat after the panel dries, because a single pass rarely clears a crusted band. Do not wire brush, grind or sand the deposit. Abrasion cuts through the protective layer, exposes fresh cement matrix, and gives the next bloom a better starting point than the first one had. Most of the "it keeps coming back" cases we see include a wire brush somewhere in their history. How to stop it coming back The deposit is a symptom, so the fix is always the water path. Keep the cavity open at both ends. The base baffle is the inlet and the head outlet must stay clear of fascia and soffit boards. Sealant in an open joint is the single most common cause of chronic bloom: it stops drainage, holds water against the panel edge, and guarantees a repeat next season. Maintain the base clearance. Paving laid tight to the cladding, or a planter bed raised against it, turns the bottom of the wall into a permanently damp zone. This is usually a landscaping decision made after handover, and it is the reason so many bottom courses bloom while the rest of the facade is clean. Finally, set expectations with the client. A new facade may bloom once during its first wet season; that is the material finishing its cure at the surface. Document the elevation with photographs at handover, and if bloom returns to the same three or four panels after the water path has been corrected, look at barrier continuity behind those panels rather than at the board. FAQ Is efflorescence harmful to the panel? Cosmetically, yes; structurally, no. It does not consume the board or reduce its strength. It is a reliable indicator that water is moving through the wall, which is why it should not be ignored. Will it go away on its own? A first-season bloom usually does, with rain and time. Recurring bloom will not, because the water source is still active. Cleaning without fixing the path simply resets the cycle. Can I clean it with bleach? No. Bleach does not dissolve calcium carbonate, and on a coated panel it can damage the finish. Use water, a nylon brush, and a mild acid if needed. Should I seal the panels to prevent it? Sealing traps moisture behind the film on a cement-based board and typically makes blistering and repeat bloom worse. The ventilated cavity is the control mechanism, not a surface sealer. How soon after installation can it appear? Often within the first wet season, particularly on elevations that face driving rain. Bloom appearing in the first months is common; bloom appearing every year afterwards is a detail fault.
Dry-Hung Fiber Cement Cladding Installation Guide
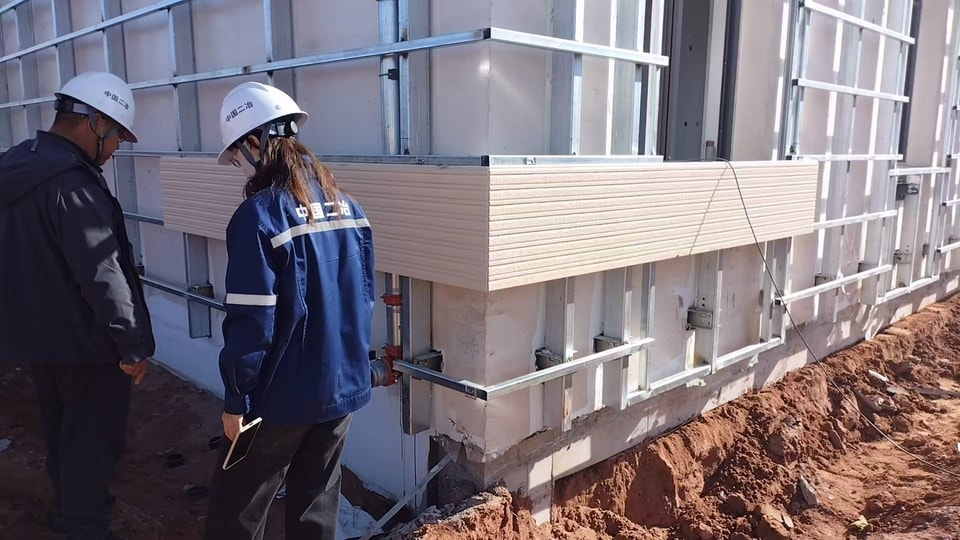
Dry-Hung Fiber Cement Cladding Installation: Step-by-Step Guide Dry-hung installation means the panel is carried by mechanical connectors over an open, drained cavity — never bonded to the wall. Six components do the work: the panel, a raised connector, a ventilation fixing metal piece, screws for the metal parts, screws for the foundation substrate, and a ventilated water baffle at the base. Get those six right and the sequence is straightforward. Get the sequence wrong and the facade leaks, drums, or both. This guide follows the order we specify for a 3030 × 455 × 16 mm textured panel on a ventilated rainscreen, with the numbers that actually govern each step. What "dry-hung" actually means, and why adhesive is not an option A dry-hung facade separates three jobs that a bonded system fuses into one. The panel provides the weather skin and the appearance. The cavity behind it drains any water that gets past the joints and lets air move up the wall to dry it. The connectors transfer wind load from the panel to the structure while allowing the panel to move independently of the substrate. Bonding collapses all three. A 26.9 kg panel set in adhesive cannot be removed without destroying it, so a single damaged course means cutting out a section and patching a joint that will never match. More importantly, an adhered panel has no drainage path: water that enters at a joint sits against the substrate, and the only exit is back out through the same joint. On a cement-based board that also absorbs 16.5% moisture by weight, that is a slow failure rather than a fast one — the wall looks fine for two or three years and then the coating blisters. The mechanical system also lets the panel do what fiber cement does best: move. Moisture deformation is 0.05% and thermal movement is small but real. A hung panel moves on its connector; a bonded panel fights the substrate and loses. The six components Component What it does What happens if it is wrong External wall panel, 3030 × 455 × 16 mm Weather skin and finish, 19.5 kg/m² Thin or undersized panel deflects between fixings Raised connector Carries the panel and sets the cavity Set out of plumb, the courses run out of level Ventilation fixing metal piece Ties adjacent panels and maintains the ventilation gap Missing, the panels butt tight and the cavity closes Special screws for metal pieces Fix panel and connector together Ordinary screws corrode or strip at the head Special screws for foundation substrate Anchor the connector to the structure Anchoring into insulation instead of structure Foundation water baffle Holds the bottom edge clear of splash and forms the air inlet Blocked by paving or soil, the whole cavity stops breathing Behind them sit three more layers that are not ours to supply but decide whether the system works: a water-resistive barrier, the insulation in the stud bay, and the substrate itself. The cavity must stay empty — it is a drainage and ventilation path, not a place to put insulation. Step 1: Set out the 455 mm module before you fix anything The 3030 × 455 × 16 mm panel is 3,030 mm long and 455 mm high, laid as a horizontal course, so the 455 mm dimension is the one that controls the whole elevation. Set out from a fixed datum at the base, run the module up the wall, and check where the courses land at the head, at every window head and sill, and at the parapet. Three rules make the difference between a facade that reads as designed and one that looks improvised: Put the cut at the least visible point. Work the module so that partial courses land at the top of the wall or under a canopy, not at eye level above the entrance. Never leave a sliver. A strip under about 150 mm reads as a mistake and is difficult to fix securely. Shift the datum and let the top course take the adjustment. Check level across the full elevation, not per bay. A 1 mm error per bay accumulates into 10 mm over ten bays, and the eye picks up accumulated error far more readily than any single joint. Mark the datum line on the substrate and carry it around corners with a laser or a water level. Everything after this step is measured from that line. Step 2: Water-resistive barrier, cavity and insulation The barrier goes on first, lapped in shingle fashion so water runs out and down, with laps and penetrations taped. It must be continuous behind the whole elevation, including behind the connector positions — a barrier interrupted at every bracket is not a barrier. Work from the bottom up, keep the upper sheet outside the lower one, and tape every lap and every penetration where a connector screw passes through. A barrier that is only stapled at the laps sheds water on the drawing and not on the wall. Then the cavity. Twenty millimetres is the practical minimum for airflow; most detailing lands between 25 and 40 mm. The cavity is bounded by the barrier at the back and the panel at the front, open at the base and open at the head. Deeper is not automatically better — past about 40 mm the connectors start to cantilever further than they need to, and the wind load has more lever arm to work with. Insulation belongs in the stud bay, behind the barrier. Putting mineral wool into the cavity itself blocks the airflow that the whole system depends on, and it holds water against the barrier when water does get in. Where extra insulation is needed, increase the stud depth or add a separate insulated sheathing layer — do not steal the cavity. Photograph this stage before the panels go on. Once the facade is closed, the barrier is uninspectable, and any defect in it only surfaces as a damp patch two winters later, by which time the cause is a guess. Step 3: Fix the raised connectors Connectors run vertically and are fixed through the barrier into the substrate, at a spacing set by the project's wind load calculation. Two practical points govern quality here: Plumb, not merely straight. A connector that is straight but out of plumb puts the panel in a slight twist, and the twist shows up as a wavy shadow line under raking light. Check with a level on every third connector at minimum. Anchor into structure. The screw must reach framing or masonry, not the insulation face and not the sheathing alone. Pull-out values from a screw buried in foam are not pull-out values; the connector will creep under wind load and the joint will open. Where panels meet end to end, the ventilation fixing metal piece bridges them and maintains the gap. These pieces are what stop the installer from pulling two panels tight together, and they are the component most often left in the van. Step 4: Set the foundation water baffle at the base The base detail does two things at once. It holds the bottom edge of the panel clear of splash and standing water, and it forms the air inlet for the cavity. A ventilated baffle does both; a solid flashing does the first and blocks the second. Set it so the bottom edge of the lowest panel finishes above the finished ground level and above the paving or deck, with enough clearance that runoff cannot wick up into the board. On a wall that meets soil, that means the baffle sits above the damp-proof course, not buried behind landscaping. This is the detail that fails most often in service, and it is almost always a site decision made after handover — a planter bed raised against the wall, a path laid 20 mm too high. Leave the clearance and write it on the drawing. Two practical notes for the crew. First, the baffle is a permanent component, not temporary protection: do not remove it to make room for a threshold or a step, and do not let the groundworker lay paving tight to it to keep a line tidy. Second, if the wall meets a different material at the base — stone, brick, a retaining wall — keep the baffle continuous across that junction rather than stopping the ventilation at the change of material. The inlet runs the length of the elevation or it does not work. Where a design calls for the panel to finish close to grade, the honest answer is that the bottom course will stay wet. That is not a panel problem to solve with a coating; it is a detail problem to solve in the setting out. Step 5: Hang the panels and set the joints Each panel weighs about 26.9 kg at 16 mm and 19.5 kg/m². That is a two-person lift with a panel carrier: light enough to position by hand, heavy enough that one person should not try. Lift, engage the connector, check the course line, then fix. Joint width is the part that gets argued about. Two movements have to be absorbed: Moisture movement of 0.05%. On a 3,030 mm panel that is about 1.5 mm of movement per panel — 3 mm across a joint between two panels. Installation tolerance, which on real sites is larger than the material movement. That is why an open joint, set with a spacer and left open, is more reliable than a joint filled with sealant. Sealant has to bond to both edges, and a cement-based panel face is a poor bonding surface; when the bond fails, the joint holds water instead of draining it. Fix screws to the specified torque and stop. Over-driving crushes the panel face around the head, breaks the coating, and gives water a place to sit. Under-driving leaves the head proud and the panel loose. If the specification is still open, the structural reasoning behind the 16 mm board — stiffness, impact and saturated flexural strength — is set out in why 16 mm is the right thickness for exterior walls. Step 6: Detail the openings Every opening needs four things: a head flashing that sheds water clear of the panel below, a sill flashing with end dams, jamb trims that close the cavity at the sides, and a continuous barrier behind all of it. The sill is where most failures start. A sill flashing without end dams is a tray that fills and overflows into the wall at both ends. The end dams turn up at the jambs and force water out to the face. Keep the cavity open around openings too. It is tempting to seal the cavity at every window because it feels tidier, but a cavity sealed at each opening is a series of closed boxes, and closed boxes do not dry. On the head, the flashing must project far enough to throw water clear of the panel face below, and it must be turned up behind the barrier rather than tucked in front of it. On the jamb, the trim closes the cut edge of the panel and the cavity at the same time; a jamb that closes only the panel leaves the cavity open to wind-driven rain. At external corners, run the barrier and the cavity continuously around the corner and close the panel edge with a corner profile. Cutting the two elevations short and butting them leaves a vertical line of exposed board edges, and it is those edges — not the face — that take up water first. Step 7: Verify the ventilation path before you leave The completed wall should have a continuous air path: inlet at the base, cavity, outlet at the head. Walk the elevation and check it: Base baffle clear, not blocked by paving, soil or a raised planter. Head outlet open, not sealed by a fascia or a soffit board. No insulation, offcuts or mortar droppings sitting in the cavity. No sealant run into the open joints. If air cannot move, the wall cannot dry, and the moisture that the panel absorbs — 16.5% by weight at saturation — has nowhere to go. A simple physical check beats a visual one. At dusk, hold a bright torch against the base inlet and look for light at the head outlet; a continuous cavity shows a continuous glow. Where the glow stops, something is blocking it, and that is the section to open up. Repeat at three or four points along a long elevation, because a blockage is usually local — a dropped offcut, a mortar droppings pile, a service penetration packed with foam. Record the result with photographs of each inlet and outlet. It takes ten minutes and it is the difference between handing over a wall you know works and handing over one you hope works. The four details that fail first Blocked base. Paving or planting raised against the baffle after handover. The cavity stops breathing and the bottom courses stay wet. Sealant in the open joint. Usually applied "to keep the rain out". It traps water behind itself and defeats the drainage plane. Sill without end dams. Water tracks to the jambs and into the wall at the two points least visible from outside. Fasteners into insulation or over-driven. The first lets the connector creep under wind load; the second breaks the coating at the screw head and starts a corrosion point. None of these are panel defects. All four are installation decisions, and all four are cheap to get right the first time. The economics are worth stating plainly, because they are what convinces a project manager to hold the line on site. Fixing a blocked base means lifting paving or cutting back planting — a landscaping job, not a cladding job, and it usually happens after the cladding contractor has been paid. Replacing a sill without end dams means removing and remaking the cladding around the opening. Re-fastening a crept connector means stripping a section of the facade to reach it. Against that, the correct detail costs a few millimetres of clearance, a spacer in the joint and ten minutes of checking. It is the cheapest insurance on the whole facade, and it is entirely within the installer's control. Pre-handover checklist Handover is the last point at which a defect is cheap to fix. Walk the elevation with the checklist below, with the installer present and the drawings to hand, and record each line as pass or fail rather than "looks fine". Items that fail go on a snag list with a date, not a promise. Check Pass condition Course levels Within tolerance across the full elevation, no accumulated drift Connector plumb Checked on at least every third connector Cavity depth Minimum maintained, no insulation or debris inside Base clearance Panel bottom clear of finished ground and paving Head outlet Open, not sealed by fascia or soffit Joint width Consistent, spacer used, joints left open Fixings Correct screws, correct torque, heads not over-driven Openings Head flashing, sill end dams, jamb trims, continuous barrier Panel condition No cracked corners, no damaged coating at fixings Spare panels At least 2% of the order retained for future damage Two lines on that list deserve their own photograph: the base inlet and the head outlet. They are the two points a future maintenance team will block without realising what they are for, and a dated photograph in the handover pack is the only thing that stops it happening. FAQ Do I need a cavity behind fiber cement cladding? Yes. The cavity is what allows drainage and drying. Without it, water that passes the joints sits against the substrate, and the panel's 16.5% moisture absorption has no way to reverse. Can the panels be installed with adhesive instead? Not on an exterior facade. An adhered 16 mm panel cannot be replaced individually, has no drainage path, and fights the substrate as it moves. The system is designed around mechanical connectors. What joint width should I use? Wide enough to absorb the panel's movement plus site tolerance. The material's own moisture movement is 0.05%, which is about 1.5 mm on a 3,030 mm panel. In practice the joint is set by the spacer and the joint detail on the drawing, and left open. How much does one panel weigh? About 26.9 kg at 16 mm and 1.379 m², which is 19.5 kg/m². Two people with a panel carrier handle it comfortably. Can I install over an existing rendered wall? Often yes, provided the render is sound and the connectors can reach the structural substrate through it. The barrier, cavity and baffle still have to be formed — the old wall does not replace any of them. How many panels do I need per square metre? One panel covers 1.379 m², so about 0.73 panels per square metre before wastage. Add 5–8% on elevations with many openings, and keep at least 2% spare for later damage.
Fiber Cement Board Thickness for Exterior Walls: 16 mm
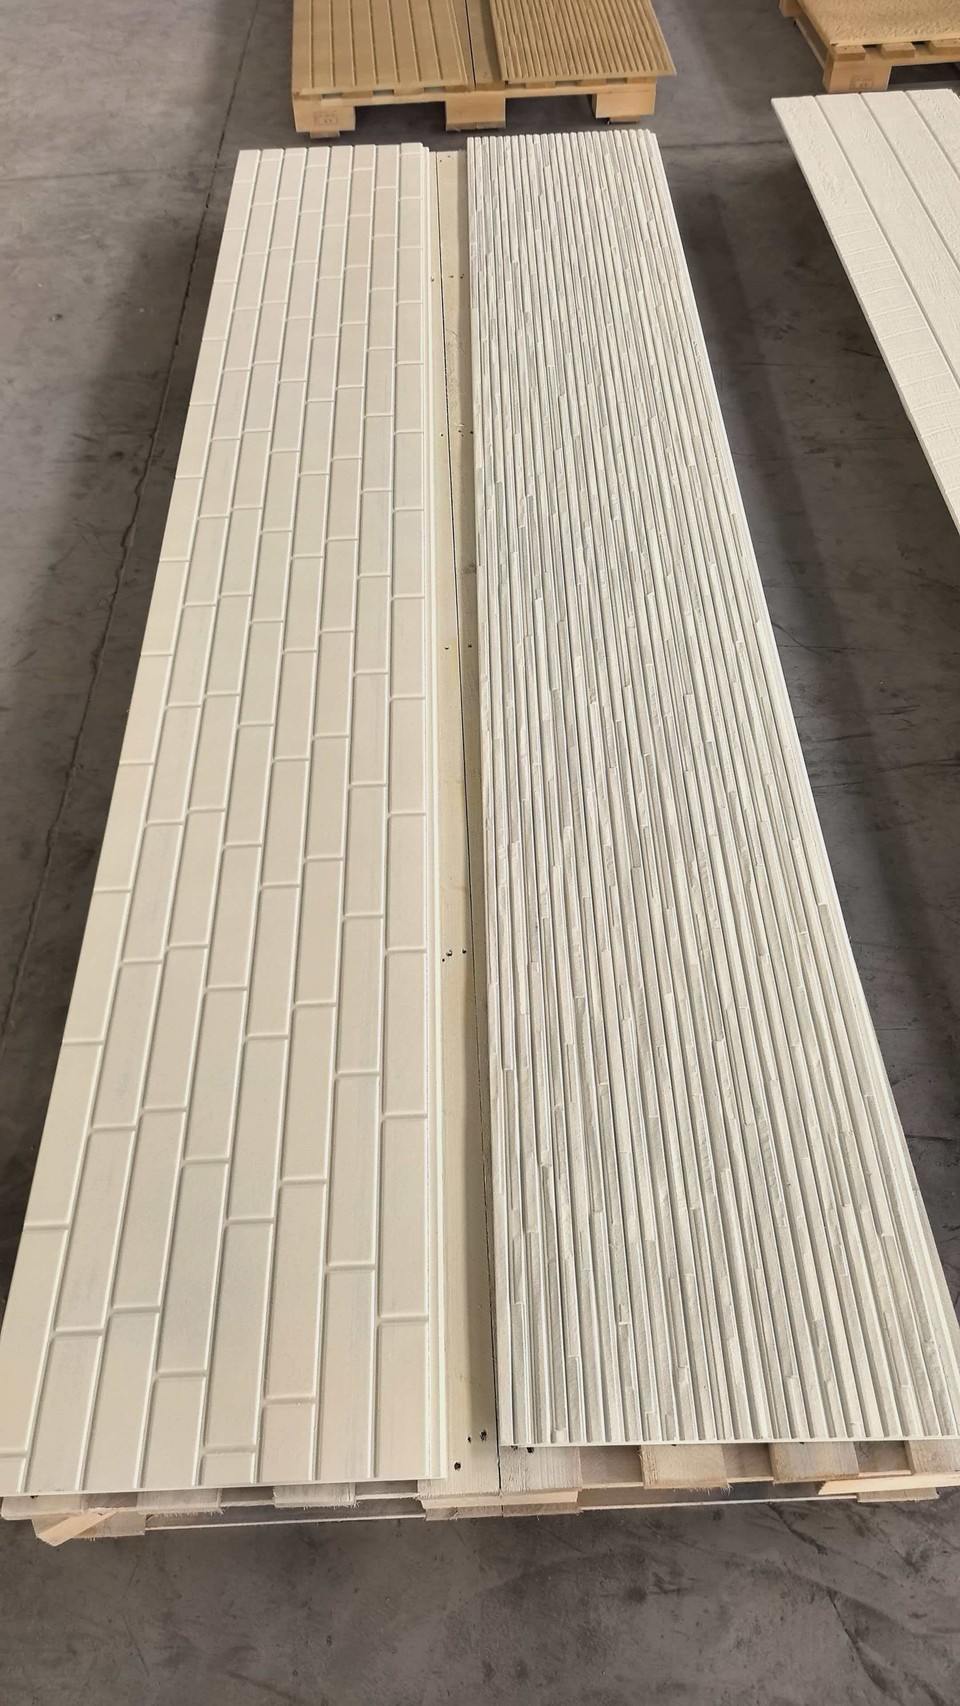
Fiber Cement Board Thickness for Exterior Walls: Why 16 mm 16 mm is the thickness that survives an exposed exterior wall. Thinner boards — 6, 8 and 10 mm — are made for soffits, interior linings and tile backer, where nothing hits them and nothing hangs on them. Once a fiber cement panel becomes the visible face of a building, the thickness stops being a cost decision and becomes a structural and durability one. This article sets out the measured data behind a 16 mm decorative panel, what the extra millimetres buy you, and the cases where 16 mm is the wrong specification. What thicknesses does fiber cement board come in? The common global sheet format is 1220 × 2440 mm, supplied in 6, 8, 10, 12, 15, 16, 18 and 20 mm. That range exists because the material serves several different jobs, and each job loads the board differently. Boards from 6 to 10 mm are typically used where the panel is fully supported and never exposed to impact: ceiling panels, soffits, interior wall lining, tile backer board under a bonded finish, and fire-rated shaft lining. They are cheap per square metre and light enough for one person to handle, which is exactly why they dominate those applications. From 12 mm upward the board starts to be specified as an exposed facade element. At 16 mm the panel is stiff enough to span between fixings without visible deflection, thick enough to hold a deep surface texture through the coating process, and heavy enough that wind-driven debris and site impacts do not crack the face. Our exterior product sits at the top of that range: a 3030 × 455 × 16 mm decorative panel with a factory-applied textured finish, installed as a dry-hung ventilated facade. It is not a 1220 × 2440 sheet cut down — the module and the thickness were chosen together for exterior use. Why 8 mm and 10 mm boards are the wrong choice for an exposed facade Stiffness does not scale linearly with thickness. For a plate bending under load, stiffness rises with the cube of thickness, so doubling a board from 8 mm to 16 mm makes it roughly eight times stiffer, not twice. That single relationship explains most of the practical differences: Deflection between fixings. An 8 mm panel at the same support spacing visibly bows under wind load; a 16 mm panel of the same span stays flat. Fixing performance. A fastener in an 8 mm board has half the embedment of one in a 16 mm board. Pull-through and edge breakout become the governing failure mode, which is why thin boards need closer fixing centres. Impact at ground level. A trolley, a ladder, a football. Thin boards dent or crack at the face; the impact test on our 16 mm board recorded no cracking on either face. Texture depth. A deep wood-grain or split-stone relief needs material behind it. On a thin board the profile either flattens or the panel loses strength where the texture is deepest. Joint stability. Thin panels move more visibly at joints under thermal and moisture cycling, so the facade reads as wavy rather than as a plane. None of this makes 8 mm a bad product. It makes it the wrong product for a wall that people walk past and weather hits. What 16 mm actually measures: the test data Thickness claims are easy to make and hard to check, so the numbers below come from the board's own type-test reports, tested to Chinese national and industry standards. Density, weight and what it means on site The measured apparent density is 1.22 g/cm³ (GB/T 7019-2024). At 16 mm that works out to: 19.5 kg per square metre 1.379 m² per panel (3030 × 455 mm) about 28 kg per panel That last number matters commercially. A 27 kg panel is a two-person lift with a panel carrier, and it does not require a crane or a vacuum lifter on a low-rise job. Compare it with a 1220 × 2440 mm sheet in the same thickness, which is 2.98 m² and around 58 kg — a genuinely different handling problem, and a different labour cost. Flexural strength and impact Flexural strength, saturated: 8.6 MPa (GB/T 7019-2024, limit 5.7). Testing in the saturated state is the honest condition — dry strength flatters every cement-based board. Impact resistance: no cracking on either face at the impact point (GB/T 7019-2024). Bending failure load: 2457 N (JC/T 2085-2011). 100 freeze-thaw cycles with no delamination or spalling, tested at the China Academy of Building Research, a CNAS-accredited laboratory. The saturated flexural figure is the one to quote in a specification, because a facade spends part of its life wet. Water: absorption and permeability are not the same thing This is where most comparisons go wrong. The board absorbs water into its thickness — measured absorption is 16.5% — and it does not let water pass through. Under GB/T 30100-2013, after 24 hours of standing water there was no damp mark and no water droplet on the back face. Moisture movement is correspondingly small: 0.05% moisture deformation (JG/T 396-2012) and 0.06 mm deflection after water absorption (JC/T 2085-2011). Those two numbers are why the joints stay tight through a wet season. Absorption still matters, for one reason: a board that takes up moisture must be allowed to dry. That is the entire logic of the ventilated cavity behind it, and it is why the wall still needs a water-resistive barrier and flashing. The panel is the rainscreen, not the waterproofing. How 16 mm changes the installation method A 16 mm decorative panel is fixed as a dry-hung ventilated facade, not bedded in adhesive. The build-up we supply works like this: A continuous drainage and ventilation cavity formed by vertical profiles. Raised connectors carrying the panel, with ventilation fixing metal pieces and dedicated screws for the metal components. A foundation water baffle at the base, keeping the bottom edge clear of standing water and splash. Panels set on a 455 mm module with open joints, so air enters at the base, rises through the cavity and exits at the head. Adhesive bedding is not appropriate here. A 27 kg panel bonded to a substrate cannot be inspected, cannot be replaced individually, and traps moisture against the wall — the opposite of what the cavity is for. The 455 mm module is also a design decision. It sets a vertical rhythm at roughly the scale of a window reveal, lets joints align with openings without slivers, and keeps each panel small enough for two installers to position accurately. The weight argument: 2.9 tonnes instead of 6 tonnes Take a 150 m² facade, which is a modest two-storey elevation. Our 16 mm panel weighs 19.5 kg/m², so the skin alone comes to about 2.9 tonnes. The masonry or cement-rendered wall it usually replaces is in the region of 6 tonnes for the same area — the comparison our technical data sheet uses. Less than half the mass for the same square metres of finished facade. Where that matters: Seismic zones. Facade mass sits high on the structure and drives lateral load. Cutting it by half reduces demand on the frame and on every connection between the cladding and the slab. Retrofit and over-cladding. Existing buildings often cannot carry a masonry-weight new skin without structural work. A 19.5 kg/m² panel frequently can be fixed to the original frame. Steel framing. Lighter cladding means lighter secondary structure, smaller footings and less crane time. Labour. Every panel on site is 27 kg, not 60 kg. Two installers can position and fix without a mechanical lifter on low-rise work, which changes crew size and programme. The number to carry into a structural conversation is the area weight, not the panel weight. Structural engineers work from kg/m² plus the fixing layout, and both are on the technical sheet. Thermal and acoustic behaviour at 16 mm Thermal conductivity is 0.25 W/(m·K) (GB/T 10294-2008). In wall terms, the measured heat transfer coefficient comparison in our technical data is: Wall construction Heat transfer coefficient (W/m²·K) Concrete 11.236 Brick 2.762 16 mm fiber cement panel system 0.806 The panel is a thin skin, so most of the insulation value still has to come from the cavity and the mineral wool inside it. What the 16 mm board contributes is a stable, low-conductivity outer surface that does not store and re-radiate heat the way masonry does, plus the ventilated cavity that carries moisture and heat away. On the acoustic side, the board's porous mineral structure absorbs in the 250–1000 Hz range — the band that covers speech, traffic and most mechanical plant noise. Combined with the cavity and insulation, that is the range that decides whether a facade feels quiet from inside. When 16 mm is the wrong specification Being straight about this saves everyone a project: Interior ceilings and soffits with no impact exposure. Use 8–10 mm; 16 mm is unnecessary weight and cost, and the fixings have to work harder for no benefit. Tightly curved surfaces. A 16 mm board does not bend to a small radius. Curved work needs a different product or a segmented, faceted design. Projects where the facade is costed to the millimetre and the wall is fully protected by a canopy or a recess. Thinner board is defensible there — provided the fixing centres are recalculated for the reduced stiffness. Bonded or rendered systems. If the design calls for a thin coat applied directly to the board, follow that system's own board specification rather than ours. Mixing a decorative panel into a render system invalidates both. Very tight construction programmes on repetitive elevations. A 455 mm module means more panels per square metre than a large-format sheet. Where speed dominates and appearance is secondary, a bigger panel can win on labour. The pattern is consistent: 16 mm is specified where the panel is seen, touched and weathered. It is over-specified where the panel is hidden behind something else. FAQ Is a 16 mm fiber cement panel too heavy for a steel stud wall? At 19.5 kg/m² it is comparable to a tiled or rendered lightweight system. What governs the design is the stud and rail spacing for the wind load, not the panel weight alone. Our technical sheet gives the fixing layout for the 3030 × 455 mm module. What does 16 mm fiber cement board weigh per square metre? 19.5 kg/m² at a measured density of 1.22 g/cm³. A single 3030 × 455 mm panel weighs about 28 kg. Can I use an 8 mm board instead and save money? For a soffit or an interior lining, yes. For an exposed wall at ground level, no — the board will deflect between fixings and crack under impact. The saving on board cost is usually smaller than the cost of the closer fixing layout it forces. Does a thicker board need different fasteners? Yes. The screw must engage the raised connector and the substrate behind it, not just the panel face. Our system uses dedicated screws for the metal components and a separate screw type for the foundation substrate. How many panels do I need per square metre? One 3030 × 455 mm panel covers 1.379 m². Allow roughly 0.73 panels per square metre before wastage; on a facade with many openings, add 5–8% for cutting. Does the textured finish affect the thickness specification? The texture is applied as a coating system over the 16 mm base board — primer, topcoat and a matte protective layer. The base thickness is unchanged, so the structural data above still applies.
Fiber Cement Siding Durability Explained
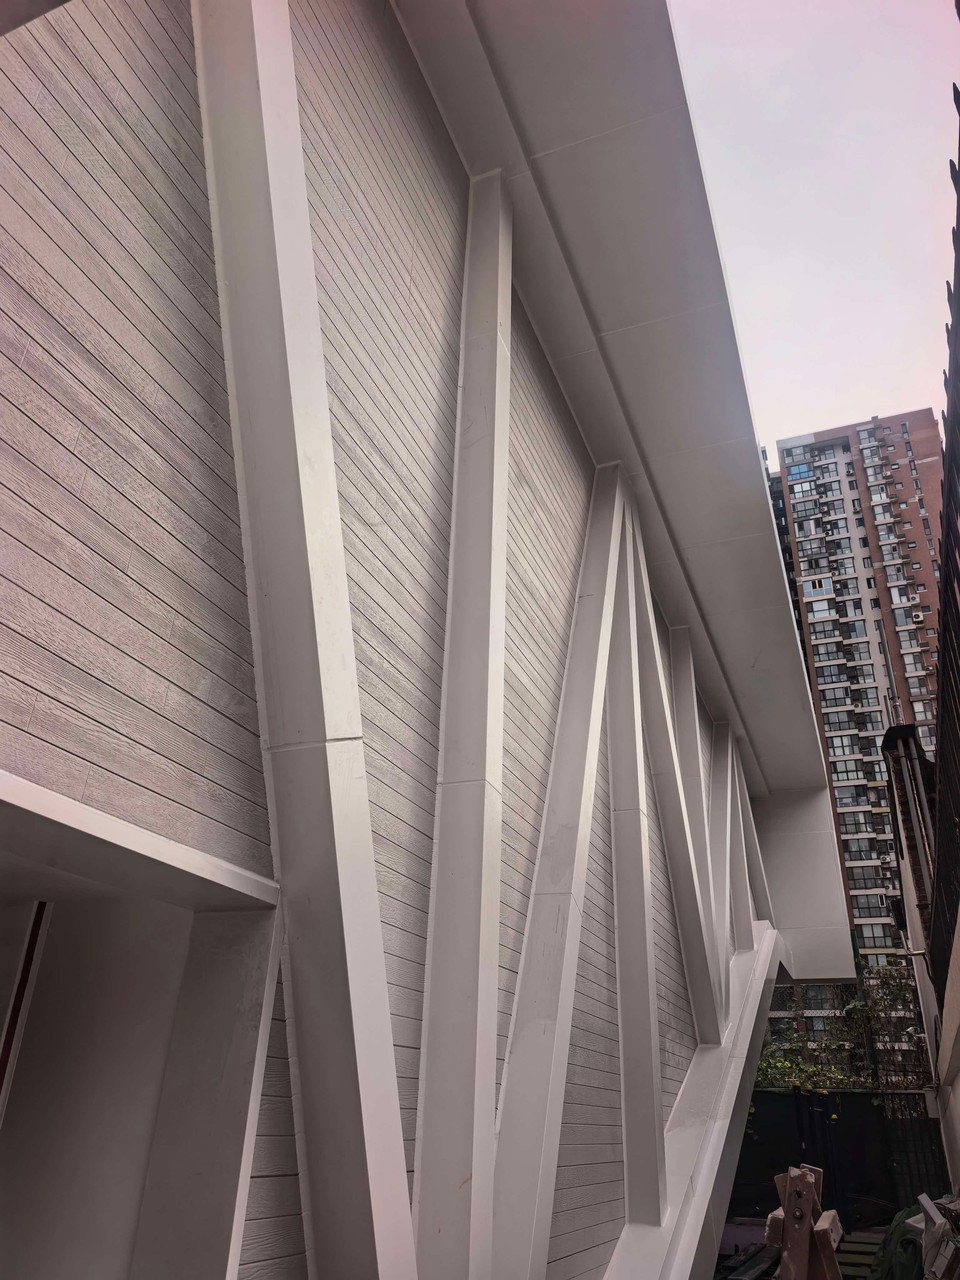
nderstanding the Longevity of Fiber Cement Siding Fiber cement siding is a durable exterior cladding that can provide decades of service when the product, installation, and maintenance suit the building’s conditions. Its longevity depends on more than the board itself: water management and finish care matter too. Understanding those factors makes it easier to evaluate fiber cement siding durability without mistaking a warranty for a guaranteed lifespan. How long does fiber cement siding last? Fiber cement siding can last for decades, but there is no universal service life for every board, climate, and installation. What can be verified is how the panel itself behaves. Our 16 mm board was tested at the China Academy of Building Research, a CNAS-accredited laboratory: after 100 freeze-thaw cycles it showed no delamination or spalling, and its flexural strength in the saturated state measured 8.6 MPa. Treat any warranty as evidence of manufacturer backing, not as a promise that every installation will perform identically. Separate three considerations when reviewing a proposal: the board’s expected performance, the finish’s maintenance needs, and the warranty’s actual coverage. A surface may need refinishing while the underlying siding remains serviceable. Likewise, a long material warranty does not automatically cover every installation problem or maintenance expense. Durability starts with water management Weather-resistant siding is not a substitute for a properly detailed wall. Flashing, a water-resistive barrier, drainage, and specified clearances work together to manage water around openings and intersections. Installation that ignores manufacturer requirements is a recognized cause of poor fiber cement performance. Ask the installer to explain these details before work begins: · Window and door flashing: How will water be directed outward at openings and penetrations? · Roof and ground clearances: How will the crew maintain the product’s required separation from wet surfaces? · Joints and cut edges: Which locations require flashing, sealing, or another manufacturer-approved treatment? · Drainage paths: Which gaps must remain open rather than being filled with caulk? These questions belong in the installation discussion because details differ between products. Requirements that recur across fiber cement cladding systems include flashing at horizontal panel joints and leaving the drainage gap above horizontal flashing open rather than sealing it shut. More sealant is not automatically better protection: a blocked drainage gap traps water against the wall behind the cladding. How does fiber cement compare with vinyl? To compare vinyl vs fiber cement siding for durability, evaluate cold-weather behavior, moisture detailing, and maintenance together. Fiber cement products may be engineered for wet and freezing conditions; vinyl installations must accommodate temperature-related movement. Neither material eliminates the need for flashing and a properly prepared wall. For a useful comparison, request documentation for the specific products rather than relying on broad material rankings. Ask each contractor to show the installation requirements and explain how the proposed wall handles drainage. Also discuss finish upkeep: fiber cement may require repainting, so its long-term appeal should be weighed against that responsibility. Both belong in a discussion of durable siding options, but the strongest proposal connects product selection to the actual building. A material name alone cannot demonstrate that the crew has addressed vulnerable transitions or followed the correct fastening instructions. Board textures, dimensions, and shake profiles The specified product is a fiber cement board, 3030 × 455 × 16 mm, supplied in wood grain and brick grain face textures. Treat these as product-selection details, not proof of weather resistance, structural capacity, or warranty eligibility. The same panel recorded an apparent density of 1.22 g/cm³ and a water absorption rate of 16.5%, and no water penetrated the board during 24 hours of exposure. Impermeability and absorption are different properties: water does not pass through the panel, but the surface still takes up moisture, so the water-resistive barrier and flashing behind the cladding remain necessary. Request the matching technical sheet before ordering. When evaluating fiber cement panels, confirm intended exterior use, fastening requirements, finish compatibility, and installation details. A fiber cement panel should be selected as part of a documented wall system, not simply because its dimensions fit the design. Manufacturer technical resources provide the appropriate starting point. For the best fiber cement shake siding comparison, prioritize longevity and durability documentation alongside appearance. Compare the exact shake products’ installation instructions, finish requirements, and warranties. A convincing wood texture is an aesthetic benefit; it does not replace evidence about performance. Installation ease and warranty deserve separate checks Choosing the best fiber cement siding for contractors means balancing installation ease with durability requirements. Review handling, cutting equipment, fastening layouts, and crew familiarity before assuming one format will simplify the job. Manufacturer guidance addresses these practical requirements, including appropriate cutting setups. Before weighing fiber cement siding pros and cons across brands, identify the exact product and the warranty document that applies to it. Published terms vary by product line, region and purchase date, and prorated coverage is common, so one product’s headline number should not be generalized to another. Confirm applicable support through the manufacturer’s own warranty resources. Before accepting any warranty comparison, check: · Whether material and finish coverage are separate. · Whether benefits decrease over time. · Which labor or replacement costs are included. · What installation and maintenance conditions apply. These distinctions matter more than comparing headline warranty lengths alone. Maintenance and environmental value Fiber cement can be a justifiable environmental choice when long service and avoided replacement support the project’s environmental goals. That is a conditional benefit, not a blanket certification. Ask for a product-specific Environmental Product Declaration to assess life-cycle impacts rather than relying on a green label. Protect the investment with manufacturer-approved cleaning and prompt attention to visible damage. Gentle washing with a garden hose and a soft brush is usually sufficient; sustained high-pressure washing can drive water into joints and damage the finish. The board’s cleanability is measurable rather than assumed: it reached Grade 0 stain resistance and withstood 10,000 scrub cycles without breaking through, which is what keeps routine washing practical. Because the face resists staining instead of absorbing it, rain tends to rinse it more evenly than a porous surface. Keep maintenance instructions with the installation records so future owners can follow them. The takeaway is straightforward: choose documented performance, insist on correct installation, and plan for upkeep. Fiber cement’s longevity is strongest when the board, finish, and water-management details work together—not when durability is treated as maintenance-free ownership. References · IIBEC Technical Advisory No. 017-2019: Fiber Cement Siding – Inherent Issues Affecting Performance · Environment Product Declaration (EPD) International Library – fiber cement cladding EPD
What is Fiber Cement Siding: Benefits & Uses
Understanding Fiber Cement Siding: Benefits and Uses Fiber cement siding is an exterior cladding made from cement, reinforcing cellulose fibers, sand, and water. It offers a wood-like appearance with resistance to rot, insects, and fire, making it worth considering for new construction or replacement siding. This guide explains its benefits, common uses, installation needs, and budgeting considerations. What is fiber cement siding? Fiber cement siding is a manufactured covering installed on exterior walls to provide a finished surface and help protect the wall assembly from weather. Available as overlapping planks, shingles, and panels, it can suit traditional homes or contemporary designs. It works as part of a complete exterior system, not as a substitute for flashing and water-management layers behind the siding. If you are asking “what is cement fiber siding,” the term generally refers to the same material. The conventional name is fiber cement siding. Its performance depends on both the product selected and installation that follows the manufacturer’s requirements. Materials and manufacturing What is fiber cement siding made of? Typical ingredients include Portland cement, sand, cellulose fibers, and water, although manufacturers may use additional ingredients. The fibers reinforce the cement-based material, which is formed into boards or panels and cured to develop strength and stability. Exact formulations and finishes vary, so check the documentation for the product you are considering. Benefits and practical limitations The main appeal is a combination of design flexibility and resistance to common siding problems. However, durable does not mean indestructible, and low maintenance does not mean maintenance-free. Installation quality, moisture exposure, and finish condition all affect performance. Rot and insect resistance: Fiber cement provides an alternative where wood decay or insect damage is a concern. Water-management details still matter because resistant cladding cannot compensate for leaks behind the wall covering. Fire resistance: Many fiber cement products are noncombustible. That is a useful material characteristic, but it does not make an entire home fireproof; the surrounding construction and wall assembly also matter. Wood-like appearance: Textured products can resemble wood siding without having the same susceptibility to rot. Smooth finishes offer another option when a less rustic appearance is preferred. Handling demands: Boards are relatively heavy, and cutting requires suitable tools and dust controls. These requirements make installation planning important rather than an afterthought. Common styles and exterior applications Fiber cement can cover an entire exterior or provide a contrasting accent. Choosing a format is partly an aesthetic decision, but joints, trim, and transitions must also be planned. Review samples alongside windows, roofing, and other exterior finishes before committing. Lap siding and shingles Horizontal lap siding creates overlapping lines associated with traditional clapboard exteriors. Shingle-style products provide a smaller-scale pattern and can be used to distinguish a gable or another feature. Combining formats can add visual interest without changing the underlying siding material. Exterior wall panels Fiber cement exterior wall panels create broader surfaces with fewer repeating horizontal lines than lap siding. Panels can support clean-lined designs or board-and-batten treatments, depending on the system. Their joints need deliberate detailing: battens, flashing, sealants, or another approved joint design must follow the applicable installation requirements. How does fiber cement compare with other home siding options? Fiber cement is worth comparing when you want a painted or wood-like exterior with strong fire and pest resistance. Vinyl, wood, metal, and masonry offer different combinations of appearance, maintenance, weight, and installation cost. There is no universal winner; the right choice depends on your priorities and the specific products available. For a useful siding cost comparison, request quotes with matching scopes rather than comparing material prices alone. Ask each contractor to itemize: Removal and disposal of existing siding. Inspection and repair of underlying sheathing. Water-resistive layers, flashing, and drainage details. Siding, trim, fasteners, and finishing work. Access equipment, cleanup, and warranty responsibilities. Treat this as a bid-comparison checklist, not a fixed price formula. A lower quote may exclude work another contractor includes. Also ask about future repainting and repairs so the decision reflects ongoing ownership costs. Siding installation tips that matter Manufacturer instructions should guide the installation, including fastening, clearances, joint treatment, and finishing. Generic advice cannot replace the requirements for a particular product and wall assembly. Confirm these details before work begins. Plan water management. Coordinate the water-resistive barrier and flashing around openings and transitions. Siding alone is not the drainage strategy. Maintain required clearances. Follow product-specific spacing from soil, roofing, and adjoining surfaces rather than using a universal measurement. Check fastening and joints. Use the specified fasteners and joint details; do not assume every seam should be caulked. Control cutting dust. Cutting can release respirable crystalline silica. Installers should use appropriate cutting methods, dust controls, and required protective equipment. Maintenance and the final decision Follow the manufacturer’s cleaning and finish-care instructions for the product you installed. General practice on coated fiber cement is gentle cleaning with a garden hose and a soft, non-metallic brush. High-pressure washing can drive water behind the cladding and damage the finish. Inspect the exterior for damaged finishes, failed sealant where applicable, and drainage problems, then address issues promptly. Before choosing, compare physical samples, review installation requirements, and obtain clearly itemized bids. Give particular attention to transitions and moisture details, not just color. Fiber cement’s benefits are most useful when the product, installation plan, and maintenance expectations fit your home. References International Residential Code (IRC) 2024, Chapter 7: Wall Covering PNNL BUILD America: moisture, impact, fire and pest resistant exterior siding CDC / NIOSH: respirable crystalline silica released when cutting cement board IIBEC Technical Advisory No. 017-2019: fiber cement siding performance issues
Can cement board be used outside
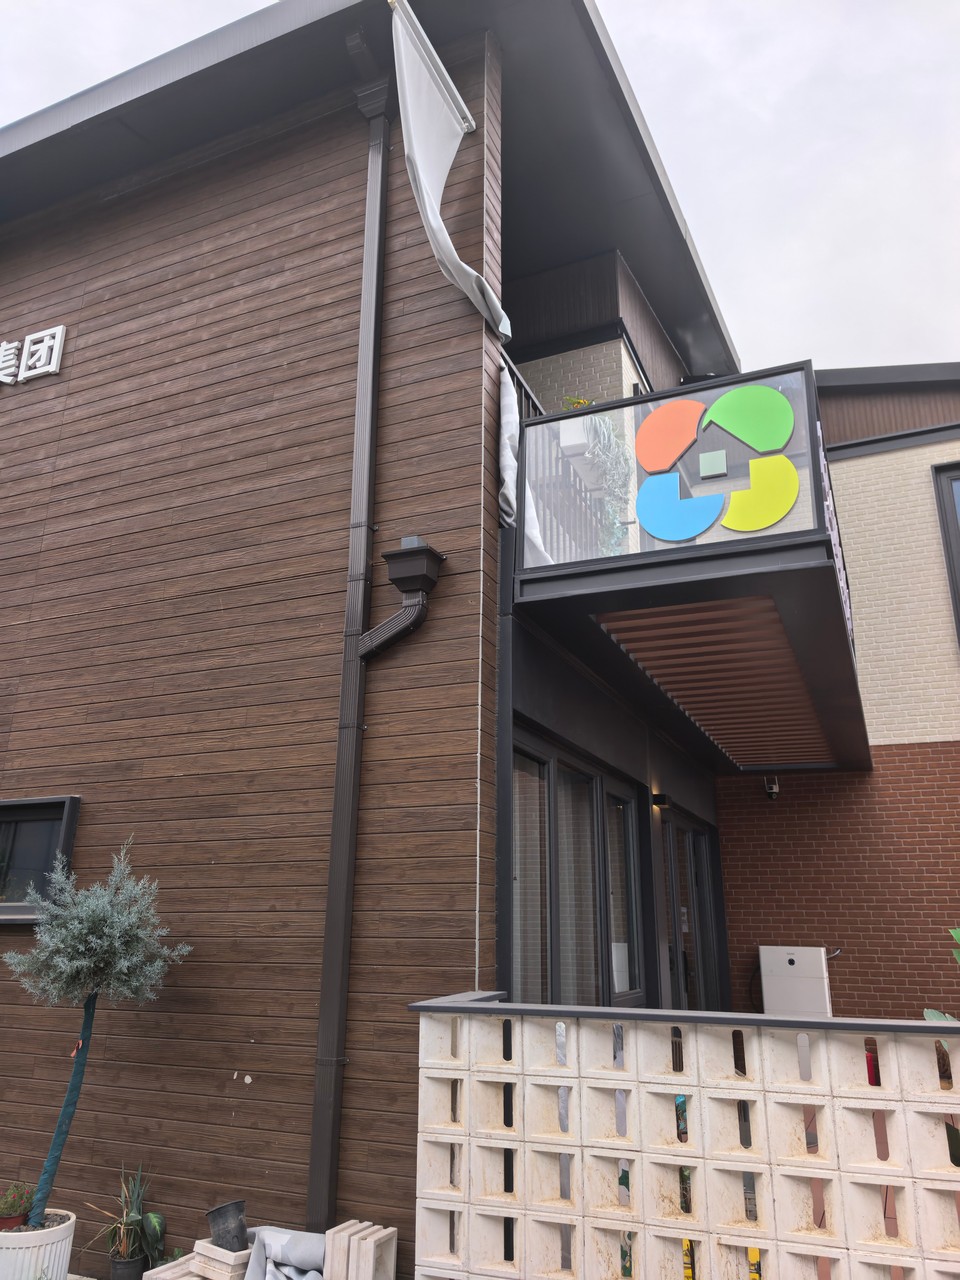
Can cement board be used outside Yes, cement board can be used outside when the specific product is approved for exterior applications and installed as part of a suitable wall system. The important distinction is between cement backer board beneath a finish and fiber cement panels designed as siding. Choosing correctly means checking the board’s intended use, moisture protection, and installation requirements—not simply whether it contains cement. Which type of cement board belongs outside? Exterior-rated cement backer board belongs beneath an approved finish, while fiber cement siding belongs on the exposed face of an exterior wall. These products serve different purposes, even though shopping descriptions sometimes group them together. Backer board is built to carry a finish bonded to its face, so its own surface is never meant to stay visible. Fiber cement cladding is built to be that finish, with a factory coating, a profile and a joint detail of its own. Before buying exterior cement board, decide what the finished surface should be: · Tile or thin brick: Choose an exterior-approved backer board and compatible finish system. Follow the finish manufacturer’s requirements for bonding materials and joint reinforcement. · Visible siding: Choose purpose-made fiber cement cladding rather than assuming ordinary tile backer board can remain exposed. · A direct-applied textured finish: Confirm that the board, basecoat, reinforcement, and finish are approved together. Exterior suitability depends on the assembly, not just the sheet. If you are comparing cement board uses, start with the installation document rather than the product’s appearance. Ask the supplier to identify the exact exterior application it permits. A board suitable behind tile is not automatically interchangeable with cement board siding. Is cement board waterproof outdoors? It depends which question you mean. Cement board does not swell, rot or lose strength when it gets wet, which is why it is used outdoors at all. Whether liquid water passes through the board is a separate test, and not every cement board is put through it. Ordinary tile backer board is expected to be covered by a finish, so its literature describes it as water-durable. An exterior cladding board that stays exposed should be tested for water impermeability, and that result is the one worth asking for. If your search started with “cement waterproof,” separate the two things: whether water damages the board, and whether water crosses it. The Shengbaoqiang board was tested for water impermeability under GB/T 30100-2013, and report BETC-T4BC-2026-01542 records that after 24 hours of standing no damp mark and no water droplet formed on the back face. The same report lists a water absorption rate of 16.5%, so the board does take moisture into its own thickness. What it does not do is let water travel through to the other side. That result describes the board, not the wall. Water enters a cladding assembly through joints, fixings and cut edges, so an exterior system still needs a weather-resistive barrier and flashing behind the board, with a designed path for moisture to drain out. Pay particular attention to windows, doors, and penetrations. Follow the specified flashing and sealant details rather than improvising with a surface coating. The practical goal is a continuous drainage strategy, not merely a water-resistant face. Self cleaning is a coating result you can test Self cleaning is a surface property, and it can be measured instead of asserted. The finished surface of the 3030 x 455 x 16 mm board was tested for stain resistance by the immersion method under GB/T 9780-2013, and report BETC-T4BC-2026-01544 records a result of Grade 0. That is what a rain-washed facade depends on: dirt does not key into the coating, so rainfall carries it away rather than leaving streaks behind. The coating was tested for durability in the same report, which is where most self cleaning claims fall apart. It survived 10,000 scrub cycles under GB/T 9266-2009 with no exposure of the substrate, showed no discoloration, blistering, flaking, powdering or softening after 96 hours in saturated calcium hydroxide solution under GB/T 9265-2009, and after 100 freeze-thaw cycles the specimens showed no delamination or flaking under GB/T 7019-2024. Tested by the CABR national testing center, these are what turn a self cleaning phrase into documentation a buyer can check. Outdoor cement board needs a planned installation Good cement board installation begins before fastening the first sheet. Verify the approved framing, attachment method, joint treatment, and finish requirements for the exact product. Exterior systems also need details that account for openings and weather exposure during construction. Use this planning checklist with your installer: 1. Confirm the application. Obtain documentation approving the board for your intended exterior finish, rather than relying on a general “moisture-resistant” description. 2. Plan water management. Identify the barrier, flashing, and drainage details before covering the wall. 3. Follow the fastening schedule. Use the specified fasteners and spacing for the selected assembly; do not borrow instructions from another board. 4. Treat joints correctly. Use the required exterior reinforcement and compatible mortar or basecoat. Joint details differ between tile, thin brick, and textured finishes. 5. Schedule finishing around weather. Follow restrictions on wet or frozen boards, application temperatures, and protection while finishes cure. Do not read permission for temporary exposure as approval for permanent exposure. If a supplier says the board tolerates weather during construction, ask how many days of uncovered exposure that covers and get the figure in writing. When you plan around a delay, work from the product’s own installation document. Cutting deserves its own safety plan. Fiber cement cutting can generate silica-containing dust, so follow the manufacturer’s cutting guidance and applicable exposure controls. Use appropriate dust collection rather than assuming working outdoors alone provides adequate protection. When should you choose fiber cement exterior wall panels? Choose fiber cement exterior wall panels when you want the panel itself to provide the finished cladding rather than serve as backing for another material. Fiber cement combines cement, sand, cellulose fibers, water, and product-specific additives. Purpose-made siding products offer exterior finishes and profiles without requiring a separate tile or brick surface. When comparing a cement siding board with backer board, ask for the siding product’s own installation instructions. For searches such as “siding panels 4x8,” treat dimensions as only one filter: confirm exterior use, finish requirements, and attachment details before ordering. A sheet’s size does not establish its role in the wall. Environmental benefits need product-specific evidence Fiber cement exterior wall panels are sometimes presented as a new type of environmentally friendly material. More accurately, they are an established material category with ongoing manufacturing improvements. Their environmental appeal can include durability, potentially fewer replacement cycles, and manufacturing practices that recover water or reduce production waste. These benefits depend on the manufacturer and product—not simply the words “fiber cement.” Look for a product-specific Environmental Product Declaration, or EPD, when evaluating those claims. An EPD provides verified life-cycle environmental information; it is not proof that every fiber cement panel outperforms every alternative. Compare documented impacts alongside expected service life, maintenance, and your project’s requirements. The takeaway: choose the system, not just the board For a cement board exterior project, first establish whether you need backing or finished siding. Then verify exterior approval, water management, and compatible installation details. The reliable answer is yes—but only when the particular board and complete assembly match the job.
Benefits of Using Fiber Cement Boards in Construction
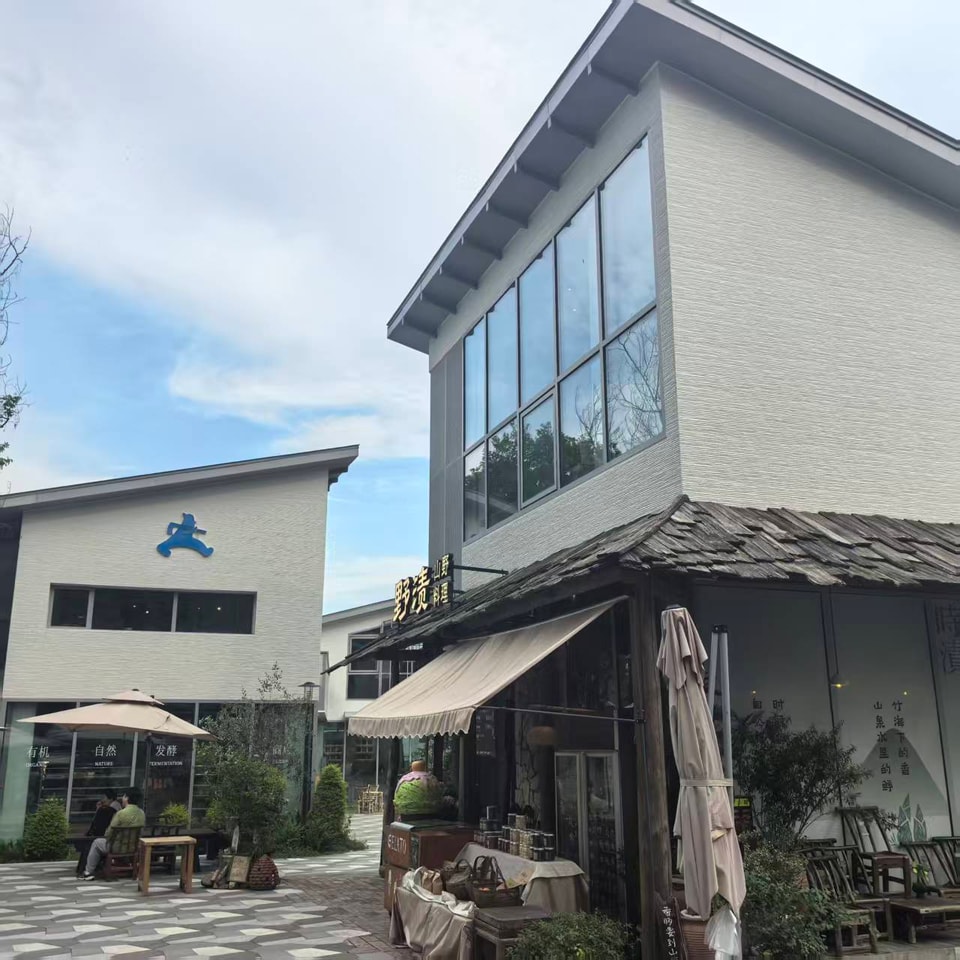
Benefits of Using Fiber Cement Boards in Construction Fiber cement boards offer a combination of weather resistance, fire performance, and design flexibility for residential and commercial exteriors. They can deliver wood-inspired or masonry-style finishes while resisting problems such as rot and insect damage. Their benefits depend on selecting the right product and installing it as part of a properly detailed wall system. What makes fiber cement boards useful in construction? Fiber cement boards combine cement, reinforcing fibers, and other ingredients to create durable cladding products. Common formulations include Portland cement, sand, cellulose fibers, and water, although manufacturers use different recipes. Also called cement fiber boards, these products are available as planks, panels, and complementary exterior components. For anyone choosing siding for houses, their appeal goes beyond appearance. Fiber cement siding provides a weather-resistant exterior surface without relying on exposed natural wood. Manufacturers offer products engineered for different climates, making product selection important rather than treating every board as interchangeable. Useful applications include: Lap siding: Overlapping planks for a traditional exterior. Fiber cement panels: Larger-format surfaces for contemporary designs or textured accents. Trim: Coordinated components for corners, openings, and other transitions. Choose components according to their approved applications rather than assuming one board suits every location. Durability against moisture and pests Among durable building materials, fiber cement stands out for its resistance to rot, pests, and weather-related deterioration. This makes cement board siding worth considering where homeowners want a wood-inspired exterior without exposed wood’s vulnerability to decay. Resistance does not eliminate maintenance, but it can reduce the problems owners need to manage. The waterproof-board description needs care: standard fiber cement siding is generally water-resistant, not a complete waterproof wall system. Joints, openings, flashing, and the backing membrane still matter. A cement board exterior must manage water that reaches behind the cladding, not merely shed rain at its face. Similarly, “insect-proof” is best understood as resistance to insect damage, not a guarantee that insects cannot enter the building. Fiber cement does not attract pests in the way susceptible wood materials can, but the surrounding construction still needs protection. Asbestos free is a test result, not a label Asbestos content decides whether fiber cement boards can be imported, specified or installed at all. Testing by polarized light microscopy against AS 5370:2024 with Amendment 1:2025 returned a negative result for all six regulated asbestos fiber types: chrysotile, amosite, crocidolite, tremolite, actinolite and anthophyllite. The method detection limit for each was 0.1% by weight, and no unknown mineral fibers were found in the tested sample. This wording matters when you compare suppliers. A negative result means no asbestos was detected at the stated limit in the sample submitted, which is a different claim from the phrase asbestos free printed on a price list. Ask for the report, check the method and the detection limit, and confirm that the board tested is the board being supplied. Fire performance you can verify from a test report Fire performance is a frequent reason to compare cement siding materials. It is a measured property. SGS tested the non-asbestos fiber cement board under AS 1530.1:2024, a combustibility test for materials, and concluded that the tested sample shall be deemed noncombustible. Across five specimens the total duration of sustained flaming was zero seconds, the furnace thermocouple temperature rise averaged 2.6 °C, and the specimen surface thermocouple temperature rise averaged 6.4 °C. Under the same standard a material is treated as combustible if sustained flaming occurs, or if either of those rises exceeds 50 °C. A fire test result does not transfer between rating systems. A noncombustibility determination under AS 1530.1 describes the material on its own; it does not award a European class under EN 13501-1, a US Class A flame spread rating under ASTM E84, or an approval for any specific wall assembly. Where a project names one of those systems, the matching report has to be produced before the board is specified. A second SGS report covers AS/NZS 1530.3:1999, which measures ignitability, flame propagation, heat release and smoke release in one test. Six specimens were tested and none ignited. The reported indices were 0 for ignitability, 0 for spread of flame and 0 for heat evolved, with a smoke developed index of 5, and the specimens discolored without igniting. That test used a 14.6 mm board with an area density of 22.9 kg per square meter, so the figures describe that thickness and finish rather than every board in the range. No siding makes a building fireproof. The complete wall assembly, insulation, openings, and other protective measures remain important, so confirm local requirements before specifying exterior building materials. Can fiber cement boards clean themselves? Some coated fiber cement boards possess a self-cleaning function, but this is a finish-specific feature rather than a property of every board. Certain panels use a photocatalytic coating designed to reduce dirt adhesion when exposed to sunlight. That coating system typically combines factory-applied color, ceramic protection, and a photocatalytic surface. When a supplier promotes a waterproof board with self-cleaning and insect-proof properties, request separate evidence for each claim. The coating may provide self-cleaning performance, while the board provides resistance to pest damage; neither establishes that every joint is waterproof. Ask what exposure conditions and maintenance instructions apply before making reduced cleaning a purchasing priority. Wood grain, stone-like shapes, and coordinated details Wood grain and stone-like shapes are appealing styles within weather-resistant board ranges. Manufacturers offer wood, stone, brick, concrete, and smooth finishes, allowing designers to combine textures without switching to a different cladding category. For example, wood-look panels can bring visual warmth to an entrance while stone-style panels define a contrasting accent. Consider the details alongside the main exterior wall boards. Fiber cement siding trim boards can frame windows and corners, while an approved soffit board can finish the underside of roof overhangs. Select fiber cement trim boards and accessories early so their profiles and finishes support the intended appearance. Specify the whole wall, not just the surface Fiber cement should not be mistaken for insulated siding. It offers modest thermal resistance, but it is not a primary insulation material. For an energy-conscious project, evaluate the insulation and wall design separately rather than expecting the cladding alone to provide substantial thermal performance. Before comparing quotations, use this checklist: Confirm the application: Match each product to its approved use and exposure. Check supporting details: Review membranes, drainage, flashing, joints, and clearances. Verify performance claims: Obtain the fire test report, the asbestos test report and coating data for the exact thickness and finish. Review installation and care: Compare specified accessories, finish requirements, and warranty conditions—not board prices alone. Manufacturer instructions make these details central to performance and warranty eligibility. The practical takeaway Fiber cement offers durability, varied finishes, and documented fire-performance options. Its strongest benefits come from pairing the right boards with compatible details and realistic maintenance expectations. Compare complete systems, verify special claims, and choose a finish that suits both the design and the building’s exposure.

Fiber Cement Board Manufacturer in China | Shengbaoqiang
Fiber Cement Board Manufacturer in China Choosing a fiber cement board manufacturer in China comes down to two things: what the board has to do on site, and whether the factory will put paperwork behind the claims printed on its own datasheet. Most buyers open with price per sheet. That is the wrong end of the question. A board that arrives under thickness, or takes a finish coat badly, costs far more than the saving once you add replacement stock and a slipped handover date. Below is what should be answered in writing before a sample is approved or an order released. Our own specification sheet is included so you can see what a complete reply looks like before you go hunting for one. How do you choose a reliable fiber cement board manufacturer in China? Start with the duty the board has to carry. An interior partition lining, an external ventilated facade, a soffit and a floor base are four different jobs, and one board is not right for all four. A supplier that knows its own range names the grade and hands over the matching installation guide without being pushed twice. Put four questions to every quotation: · Product identity. Which product code, thickness, surface texture and edge detail does this price cover? · Use approval. Is this board suitable for the exposure and the subframe shown in our drawings? · Proof. Do the test reports name the board being sold, or an unrelated range from the same cement board factory? · Responsibility. Who answers technical queries during the job, and who carries the cost when a delivery fails inspection? Almost every listing on page one calls itself a high quality fiber cement board manufacturer. That phrase carries no information until a datasheet, a report and a written installation method are attached to it. Compare the attachments, not the adjectives. What a board manufacturing company should be able to explain Fiber cement products are built from a short ingredient list: cement, reinforcing fibre, silica fume and mica. What separates one board from another is particle gradation, forming pressure, and how long the sheet is allowed to cure. On our line the slurry is formed under high temperature and pressure, cured, then given a secondary cure before drying, cutting to length and spray coating. Autoclaved sheets and sheets hardened by a shorter route do not move, span, or take a finish the same way. Ask the cement board manufacturer to walk you through its checks in plain language instead of sending a brochure. The tolerance on length, width and thickness. What is verified on finished boards. How a pallet label traces back to a production batch. Those three belong in your purchase specification. A visual inspection at the port is not a quality system. When you order samples, take the same grade, texture and colour you intend to buy, and write down what the sample is meant to prove. A sample settles appearance and handling. It says nothing about the container that lands three months later. Shengbaoqiang product attributes Every figure below comes from our current catalogue or from reports issued against Chinese national and building industry standards. Ask any supplier for the same two columns: the number, and the method behind it. Shengbaoqiang fiber cement board: product attributes. Attribute Detail Board size 3030 mm x 455 mm Thickness 16 mm Area per piece 1.38 m² Weight per piece 28kg Pieces per pallet 54 or 80, covering 74.5 m² or 110.4 m² Surface textures Flat, rock grain, stripe, wood grain and brick pattern. Five series, 30 product codes, four stock colours each Typical applications Ventilated external facades, gable and balcony panels, soffits and eaves, parapets, boundary walls, interior wall lining Surface finish system Penetrating primer, decorative topcoat, matte protective coat Apparent density 1.22 g/cm³ (GB/T 7019-2024, 5.3) Water absorption 16.5 % (GB/T 7019-2024, 5.3) Flexural strength, saturated 8.6 MPa (GB/T 7019-2024, 5.7) Moisture deformation 0.05 % (JG/T 396-2012, Annex D) Bending failure load 2457 N (JC/T 2085-2011, 6.6) Thermal conductivity 0.25 W/(m·K) at mean 25 °C (GB/T 10294-2008) MOQ Single pallet release accepted. Mixed series by container on request Colour customisation Custom colour matching free of charge to RAL, NCS or a physical sample you send us Samples Free sample set of the exact texture and colour. Buyer covers courier or arranges pickup Technical documents Datasheet, GB/T and JC/T test reports, dry hanging installation details, finish sequence for coated boards Send that sheet to each shortlisted cement board supplier and ask them to fill it in. Anyone who leaves two thirds of it blank is quoting a different product from the one you need. Green, waterproof, fireproof and insect proof: get each claim separately Four words in a quotation are four separate tests, and not one of them is a blanket guarantee. · Water. Our boards return 16.5 % absorption and no wet mark on the back face after 24 hours of static exposure. That is resistance to liquid water, not a watertight wall. The weather barrier behind the panels still does that job. · Fire. A mineral cement board contains no organic fuel. That describes the material, it is not a rating. Fire behaviour belongs to the whole assembly, cavity and insulation included, and only an assembly test states a rating. · Insects. Termites do not eat cement. That is a narrower claim than insect proof, and it is silent on the battens behind the board. · Emissions. E0 is a formaldehyde emission class that appears in some product literature. It is not a product name and not a performance claim, and one supplier's E0 line proves nothing about another supplier's board. Does fiber cement board need a bonding agent before skim coating? Sometimes, and the answer comes from the system you specify rather than from the board alone. Our cladding leaves the line with three coats, so a skim coat over that face bonds to a factory coating, not to cement, and the coating supplier's instructions govern. Over bare, uncoated board the reverse applies: a primer or bonding agent is usually required, because the raw surface pulls moisture out of the compound too quickly and adhesion drops. Buyers searching for a fiber cement board skim coat bonding agent required manufacturer, or a skim coat fiber cement board bonding agent required manufacturer, are really after one document. That document should name the surface preparation, the approved joint filler and tape, the primer with its dilution and drying time, the permitted skim coat thickness, and the compatible topcoat. Build a mock up panel with the real boards and real finish materials before a full elevation goes up, and agree the acceptance criteria in advance. A smooth sample panel is not approval of a system. What should a fiber cement board thermal conductivity manufacturer PDF show? The product, the value, the units, the test method and the test conditions. Ours reports 0.25 W/(m·K) measured to GB/T 10294-2008 at a mean temperature of 25 °C, on the same board grade we ship. That figure moves with moisture content and temperature, which is why the conditions matter as much as the number. Do not lift a value written for a different density and expect your design calculation to hold. Keep the performance groups apart. Heat flow through a material is not a fire class. On complete wall structures at 25 °C we measured 0.806 W/(m²·K) for our panel against 2.762 for brick and 11.236 for concrete. Those are assembly values and sit in a different column from the table above. Documented fit beats broad promises The safest order you can place links specific fiber cement panels to a defined duty, an agreed specification and evidence you have actually read. Close the open technical questions before the deposit leaves. A low opening price has never paid for a re delivery. Specifications, colour matching and free sample requests go to Shengbaoqiang, Hai'an, Nantong, Jiangsu. www.sbqwallpanel.com
House Fiber Cement Siding: Cost, Profiles and Upkeep
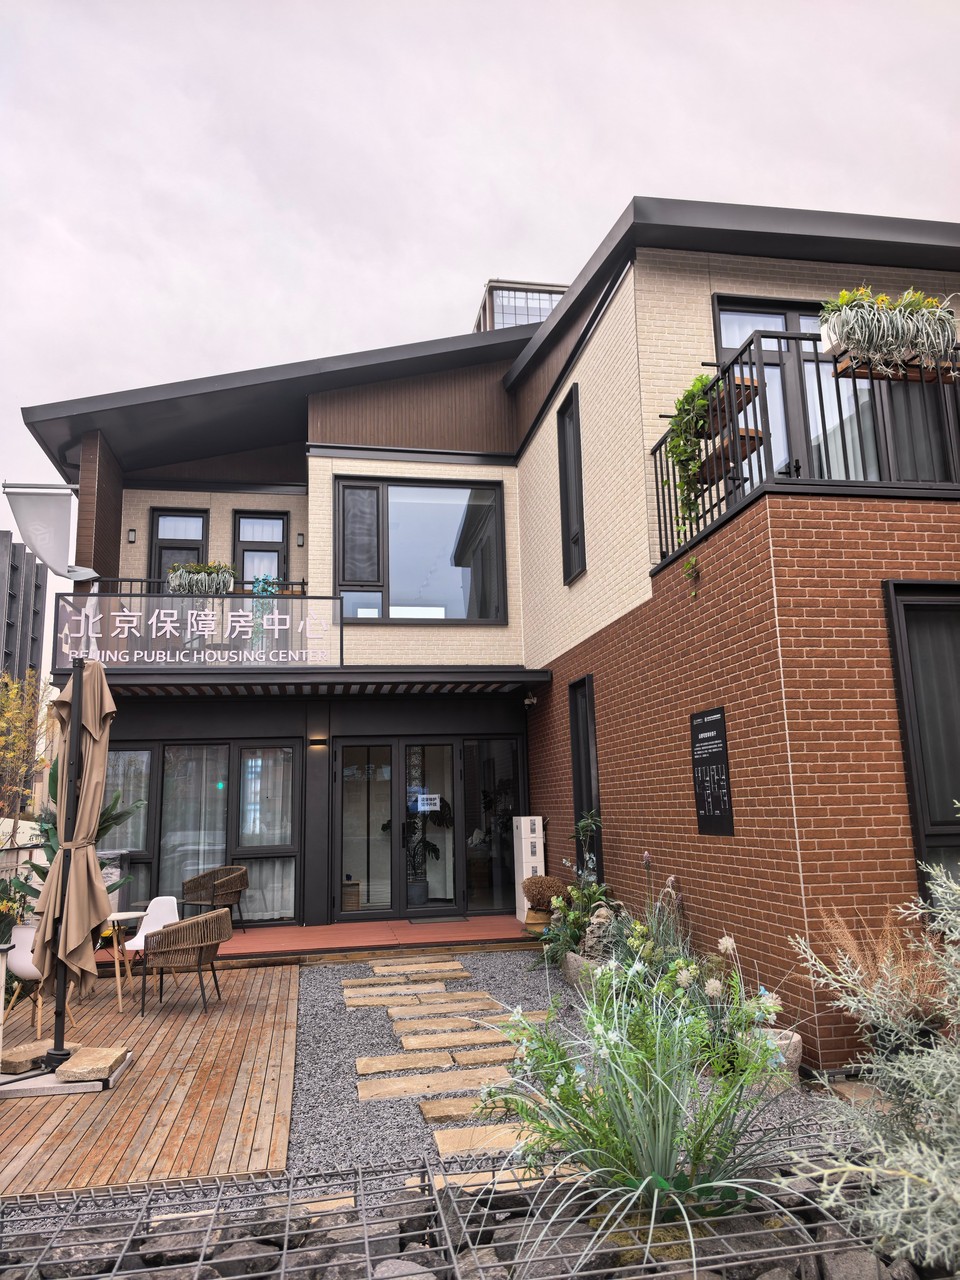
House Fiber Cement Siding: Cost, Profiles and Upkeep Fiber cement siding is an exterior cladding option for homeowners who want wood-inspired textures, clean panels, or traditional lap siding. Among building materials for siding, fiber cement offers several design options, but choosing it also means planning for installation, finishing, and upkeep. This article explains the material, the factors behind project costs, and what to discuss with an installer before committing. What is fiber cement siding? Fiber cement siding is manufactured exterior cladding made from cement, reinforcing cellulose fibers, and other ingredients. The usual mix combines cellulose fiber with Portland cement, silica, water, and small amounts of additives. That slurry is formed into boards or panels with smooth or textured surfaces. You may encounter the terms cement siding and cement board siding while shopping. Specify exterior siding rather than assuming every cement-based board serves the same purpose: manufacturers list siding, trim, soffits, and backer board as distinct products. Ask suppliers to identify the exact product and intended application on your order. For your house, fiber cement siding should be evaluated as part of a complete exterior project, not simply a board purchase. Include the desired finish, trim details, installation requirements, and maintenance expectations in your comparison. Manufacturer guidance emphasizes considering both upfront expenses and ongoing care. Choose a profile that suits the whole exterior Fiber cement exterior siding comes in lap boards, vertical panels, shakes, and shingles. Smooth and woodgrain finishes offer different visual effects, while coordinating trim helps define openings and corners. Start with the overall appearance you want, then narrow your choices to compatible products. Use these design prompts when reviewing samples: · Horizontal lap: Consider it when you want continuous horizontal lines across the main walls. · Fiber cement vertical siding: Review panel layouts and batten placement together rather than selecting panels alone. · Shakes or shingles: Consider whether to use them throughout the exterior or as a contrasting accent. · Fiber cement siding trim: Compare widths and finishes alongside the siding sample, not afterward. Before choosing siding with fiber cement, request a layout showing where profiles change. Ask the installer to explain corner treatments and transitions. This makes the intended design clearer before materials are ordered. What determines fiber cement siding cost? Fiber cement siding cost depends on the selected products, exterior wall area, home height and shape, local labor, and the work included in the installation. A material-only price cannot establish the total project budget. A site-specific estimate is the more useful starting point. When comparing fiber cement board siding cost, request a written breakdown rather than relying on one headline figure. Use the following checklist to establish what each proposal covers: Quote item What to clarify Siding and trim Product names, profiles, finish, and quantities Preparation Removal, disposal, and any wall repairs included Installation materials Flashing, fasteners, and water-management components Finishing Painting, touch-ups, and sealant work Additional work Exclusions and approval process for unexpected repairs Home size and shape, product selection, and project scope move the price more than anything else. Use your itemized checklist to bring competing proposals onto comparable terms before choosing a contractor. Avoid setting a budget from floor area alone. Ask contractors to explain their exterior measurements and assumptions. Keep any allowance for concealed damage separate from the confirmed work so you understand what could change. How to nail fiber cement siding correctly? The answer to how to nail fiber cement siding is to follow the exact product’s installation instructions, including approved fasteners, placement, spacing, and fastening depth. There is no universal nail schedule for every board and wall assembly. Product manuals typically specify corrosion-resistant fasteners and warn against overdriving them. Before work begins, confirm these details with the installer: 1. Fastener selection: Identify the approved nail or screw for the product and supporting wall. 2. Placement and penetration: Follow the applicable fastening schedule rather than guessing from board width. 3. Driving depth: Avoid overdriven fasteners, which can reduce holding power. 4. Nailing method: Confirm whether the application calls for blind nailing or face nailing. Cutting also requires planning. Fiber cement work can generate respirable silica dust, so ask about the manufacturer’s cutting guidance and the crew’s dust-control procedures. Treat these precautions as part of installation planning, not an optional extra. Select installers by the details they explain When interviewing fiber cement siding installers, ask each contractor to identify the product instructions they will follow. Request examples of comparable work and an explanation of flashing, clearances, fastening, and finishing. Manufacturer guidance recommends experienced siding professionals for full siding projects. A search for fiber cement siding Indianapolis returns pages of local contractors. Use the same questions to assess their proposals: who supervises installation, how unexpected repairs are authorized, and what documentation you receive afterward. Do not treat a local search ranking as evidence of installation quality. Plan for care after installation House fiber cement siding still needs routine care. Gentle cleaning beats pressure washing, which can damage the factory finish and force water into the joints. Follow the selected product’s instructions for cleaning and repairs. Do not assume all cement siding materials are the same, and do not assume fiber cement house siding from two mills will age the same way. Keep product information, finish details, and installation records together. Before approving the project, request written maintenance guidance. Choose the profile you like, compare complete proposals, and prioritize an installer who can explain the details behind the finished appearance.
Contact Us