
Fiber Cement Board Guide: Uses, Benefits & Installation
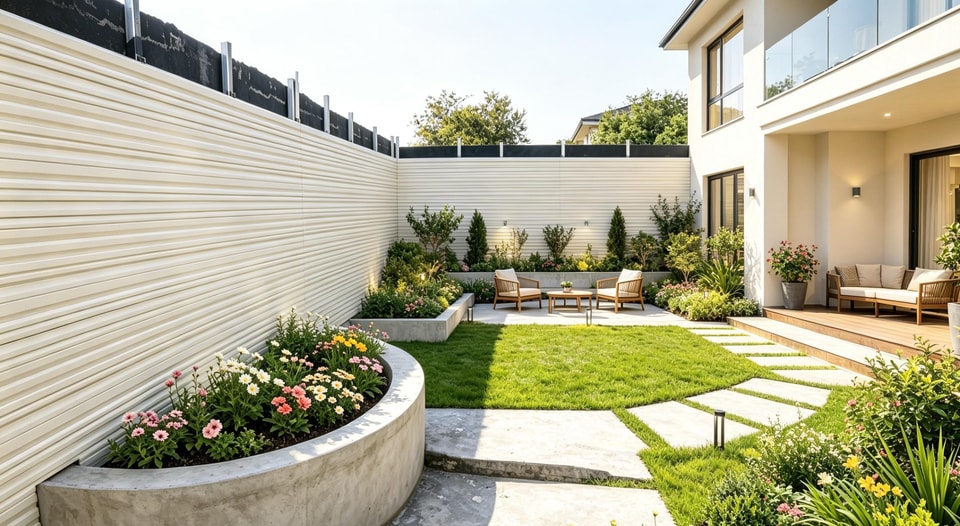
Understanding Fiber Cement Board: Benefits and Uses Fiber cement exterior wall panels are a new type of environmentally friendly exterior wall panels, mainly used for exterior wall shaping and decoration. Of course, they can also be used indoors. Compared with other exterior wall materials, they can better cope with various extremely harsh environments. This stable advantage has also made them a choice for many builders.This guide explains what it is, how it is made, where it is used, and what to consider before fiber cement installation. What is a fiber cement board? Fiber cement board is a type of manufactured wall panel featuring various surface textures, designed for the decoration of exterior walls. In simple terms, it is a panel primarily composed of cement and fibers. It offers excellent strength, requires no cleaning or maintenance, and is capable of withstanding a wide range of weather conditions; it is commonly referred to as exterior cement siding or decorative cladding. People often compare these to standard cement boards, but they are not the same thing. When someone mentions "cement board," they might be referring to a backing board used for interior floors or walls. In contrast, "fiber cement board" typically refers to exterior decorative wall panels that feature textured surfaces—such as wood grain, stone, brick, or linear patterns—which provide a more aesthetically pleasing finish for the outer layer of a wall. What is fiber cement board made of? Fiber cement board is typically made from a blend of cement, silica or sand, cellulose fibers, water, and other performance additives. The cement provides hardness and dimensional stability, while the fibers help reinforce the sheet and reduce brittleness. In practical terms, this combination helps explain why a fiber cement panel can be thin enough to install as cladding yet tough enough to perform on exterior walls. The exact formula varies by manufacturer and product line, so always check the technical data sheet for the board you plan to use. Some boards are designed as smooth architectural panels, some mimic wood grain, and others are made as lap siding, shingles, trim, or utility sheets. That is why the question “what is cement fiber board” is best answered by looking at both the material composition and the intended application. Main benefits for building projects Fiber cement is popular because it gives a building a clean, finished appearance while solving several practical problems. It does not behave like natural wood, vinyl, gypsum, or masonry; instead, it sits in a useful middle ground where durability, design flexibility, and maintenance control all matter. Key benefits include: · Weather resistance: Fiber cement can be used on exterior walls where sun, wind, rain, and temperature changes would quickly wear down less durable materials. · Dimensional stability: Quality boards are made to hold their shape when properly stored, cut, fastened, and sealed. · Design flexibility: Products may come as planks, shingles, trim, soffit panels, or 4x8 exterior siding sheets for broad wall coverage. · Paintable surfaces: Many boards are primed or ready for approved coatings, allowing a wide range of colors and finishes. · Low appeal to pests: Because it is cement-based, it is not a food source in the way wood can be. · Strong curb appeal: Exterior cement siding can create a crisp modern façade, a traditional lap-siding look, or a panelized architectural style. These benefits depend on choosing the right product and installing it correctly. A board that performs well as exterior siding may not be the right choice for a shower wall, floor underlayment, or fire-rated assembly unless the manufacturer states that use clearly. What is fiber cement board used for? Fiber cement board is used for exterior cladding, wall panels, siding, soffits, trim, decorative façades, and certain interior wall applications. It is especially useful where builders want a surface that looks finished but can tolerate exposure better than many wood-based materials. In residential and light commercial projects, it is often chosen for siding replacement, new construction exteriors, porch areas, garages, accessory buildings, and feature walls. Common cement board uses include: 1. Exterior siding: Lap boards, shingles, and panel siding can cover large wall areas while creating a finished building envelope. 2. Large sheet applications: A 4x8 exterior siding panel may be used where fewer seams and a more continuous surface are desired. 3. Cement board wall assemblies: Panels can help create durable wall surfaces when paired with the correct framing, fasteners, flashing, and sealants. 4. Soffits and eaves: Some fiber cement products are designed for overhead exterior areas that need stability and a clean appearance. 5. Trim and accent details: Thicker boards or trim products can frame windows, doors, corners, and transitions. 6. Architectural façades: Smooth fiber cement panel systems can support modern, grid-like exterior designs. The most important rule is to match the product to the use. “Fiber cement board” is a broad category, not a universal substitute for every cement-based sheet. Fiber cement compared with other board materials Fiber cement is often selected when the project needs something tougher than wood-based sheet goods but lighter and easier to detail than masonry. Compared with wood siding, it offers stronger resistance to rot-related concerns when installed and maintained correctly. Compared with vinyl siding, it usually provides a heavier, more rigid appearance that many homeowners associate with a premium exterior. Compared with gypsum-based wallboard, fiber cement is much more appropriate for exterior exposure when the product is rated for it. Compared with tile backer cement board, exterior siding products are typically finished and detailed differently, with attention to joints, drainage, clearances, and coating systems. The best choice depends on the wall assembly, climate, design goals, budget, and local code requirements. Installation basics that affect performance Fiber cement installation is not only about fastening boards to a wall. The product must be stored dry, handled carefully, cut with appropriate tools, and installed according to the manufacturer’s instructions. Small mistakes at joints, edges, clearances, or penetrations can create long-term problems even when the board itself is high quality. A basic installation checklist includes: · Confirm the board is approved for the exact location and exposure. · Keep panels dry and flat before installation. · Use the specified fasteners, spacing, and framing support. · Leave required gaps at joints, corners, trim, roofs, decks, and grade. · Use approved flashing details above windows, doors, and horizontal transitions. · Seal, prime, paint, or finish cut edges when required. · Follow dust-control practices when cutting cement-based materials. · Check local building codes and product-specific installation manuals. For large panels, layout matters as much as fastening. A fiber cement panel should be planned around seams, openings, expansion requirements, and visual alignment. On a cement board wall, good detailing keeps the wall looking intentional rather than patched together. Choosing the right fiber cement product The right product depends on where it will be installed and what finish you want. A smooth architectural panel suits a modern façade, while lap siding works better for a classic residential exterior. A 4x8 exterior siding sheet may be efficient for broad wall areas, but smaller planks can be easier to handle and may fit the design better. Before buying, review these factors: · Application: siding, soffit, trim, interior wall, or specialty panel · Thickness and format: plank, shingle, sheet, or panel system · Texture: smooth, wood-grain, stucco-like, or architectural finish · Finish condition: factory-primed, prefinished, or field-painted · Edge treatment: square, shiplap, grooved, or concealed-fastener compatible · Warranty and requirements: coverage often depends on correct installation and maintenance If you are comparing products, avoid choosing by thickness or price alone. A cheaper board can become expensive if it needs extra labor, incompatible accessories, or frequent repainting. Maintenance and long-term care Fiber cement is often described as low maintenance, but that does not mean no maintenance. Exterior surfaces still need periodic cleaning, paint inspection, caulk review, and attention to areas where water collects. Keeping gutters working, trimming vegetation away from walls, and repairing damaged coatings helps protect the full wall system. Look closely at lower wall sections, window trim, roof-to-wall transitions, and horizontal joints. These are the areas where water management matters most. When cleaning, use gentle methods recommended by the manufacturer rather than aggressive pressure that can damage coatings or force water behind the siding. Final takeaways Fiber cement board is a versatile material for durable siding, panels, trim, and wall surfaces. It is made from cementitious ingredients reinforced with fibers, which gives it strength, stability, and broad design potential. Whether you are researching what is fiber cement board used for or planning an exterior cement siding project, the best results come from matching the board to the application and following proper installation details. For homeowners, it offers a clean and durable exterior option with many style choices. For builders and remodelers, it provides a practical panel or siding system when performance, appearance, and long-term serviceability all matter.
How to Install Fiber Cement Siding:Dry-Hung,Step by Step
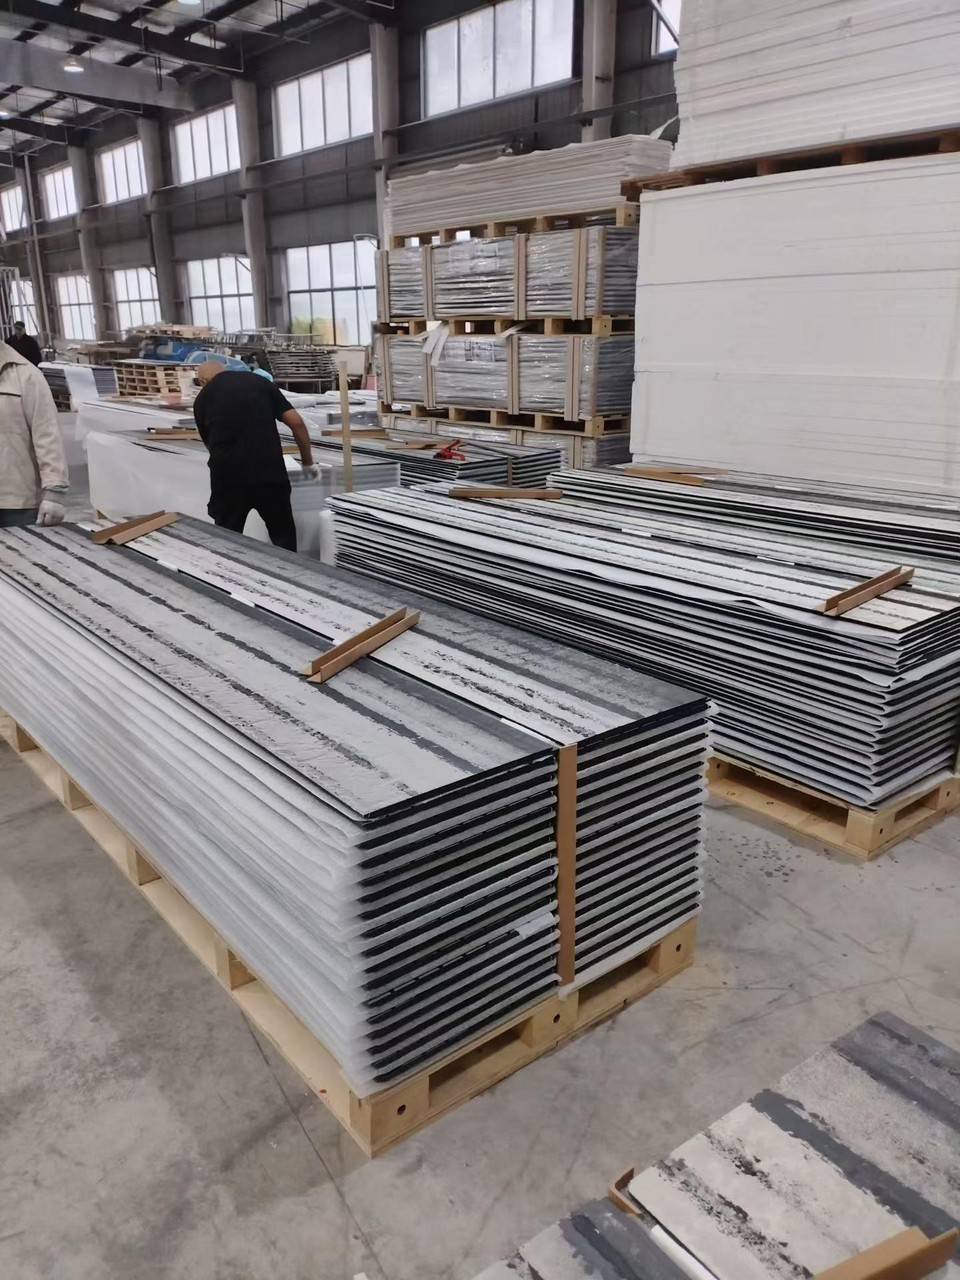
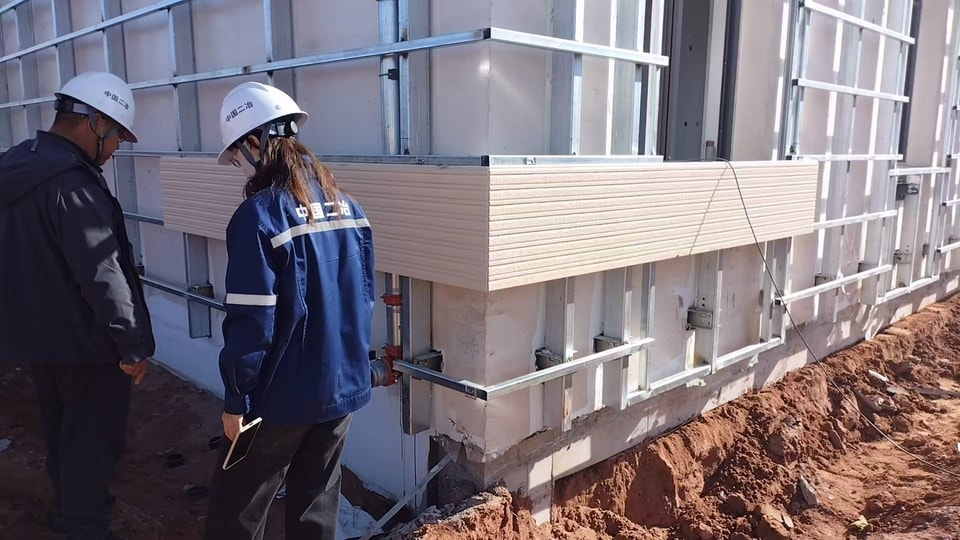
How to Install Fiber Cement Siding: Dry-Hung, Step by Step Fiber cement siding fails at the fixings, not in the panel. Get the cavity, the joints and the flashing in the right order and the board sits on the wall for twenty years. Get them wrong and you're back on the scaffold in eighteen months. This is the dry-hung sequence we supply with our panels. No adhesive, no mortar bed, no wet trade on site. The panel you're hanging A 3,030 × 455 mm board, 16 mm thick. One panel covers 1.38 m² and weighs about 30 kg as shipped — plan for two people from the first lift. Property Value Size / coverage 3,030 × 455 × 16 mm · 1.38 m² per panel Weight approx. 28 kg Apparent density 1.22 g/cm³ Saturated bending strength 8.6 MPa Water absorption 16.5 % Moisture deformation 0.05 % Thermal conductivity 0.25 W/(m·K) at 25 °C The core is cement, fiber, silica fume and mica, formed under high temperature and pressure and cured twice before cutting. What you see is a four-layer coating: penetrating primer, decorative topcoat, matte protective layer. You're hanging a finished facade, not prepping one. Every panel in the crate is the same 455 mm. That matters more than the 1,500,000 m² annual capacity behind it, because a module that drifts halfway up an elevation is a rebuild. The system, and why the cavity matters Dry-hung means the panel rides on metal connectors fixed to a rail, with an open cavity behind it. Component Job Raised connector Hooks the panel to the rail; concealed, nothing shows on the face Ventilation fixing metal piece Vertical rail, carries the connectors, sets cavity depth Base water baffle Sheds water out of the cavity, blocks wind-driven rain at the inlet Breather membrane Vapour out, bulk water off the sheathing The cavity runs the full height of the wall, open at the base and open at the head. Air enters low, warms, rises, leaves at the top carrying moisture with it. Block that path anywhere and you've built a condensation trap with a decorative face. Cavity depth and rail spacing come from the wind load on that elevation, not from habit. Step 1 — Set out before you touch a panel Check the substrate is plumb, dry and sound. A 3 m straight edge tells you more in ten minutes than a level does all morning. There's no thickness in a 16 mm panel to hide a deviation — whatever the frame does, the facade copies. Brick or block gets a parge coat or packers before the rails go on. Concrete needs its moisture down to what the membrane can handle, and a reading taken on site beats an assumption made in the office. Then set out on the 455 mm module, marking panel edges and openings together. Landing a reveal on a module joint is easy on paper and miserable on a wall. Joints get an allowance, not a butt. At 0.05% moisture deformation a 3,030 mm panel moves about 1.5 mm. Small, but a tight butt has nowhere to go, so the movement shows up as a cracked bead or a lifted edge. Step 2 — Membrane, base baffle and the air path Run the breather membrane over the substrate, lapping in the direction that sheds water, and tape the laps. Lap it over the base baffle, not under — water runs downhill and it will find the wrong lap every time. The baffle does two jobs: it throws water out of the cavity and stops wind-driven rain being pushed up into it. It also sets the lower inlet, so it sits below the first panel with the cavity open above. Check the path before you close anything up. Look up the cavity from the base; if you can't see daylight at the head, air won't move either. Insulation goes behind the membrane, never into the cavity — the cavity is for air. Where pipes, brackets or cables cross the membrane, seal the penetration before the panel goes on. A neat hole with a grommet outlasts a generous bead of sealant, and it's the one leak you can't see once the facade is closed. Step 3 — Rails, connectors and the first panel Fix the rails plumb. Spacing and fixing centres come off the project drawing and change with wind load, panel height and substrate; don't carry a number from the last job to this one. Hang the first panel on the baffle, engage the raised connectors, check level before you drive anything home. That panel sets the line for everything above it, so this is the one time to be slow. Drive until the connector seats. Over-driving crushes the board around the head and leaves a stress point that shows up later as a hairline crack; under-driving leaves it loose in wind. If a screw spins it's in the wrong place — move it, don't torque it harder. Check plumb on the rail, then on the panel. A straight rail and a crooked panel usually means a connector that hasn't seated, not a rail that moved. Step 4 — Run the field, then close the top Work upward in courses, keeping the module and the joint allowance consistent. Check plumb every third or fourth panel, not at the end: 3 mm at the bottom is 30 mm at the head of a three-storey wall. At openings, cut and dry-fit first. Flashing goes on before the panel does, not after. Close the top with a head flashing that still lets air out. A sealed head turns a ventilated facade into a sealed box. This is the detail fitters rush and the one that decides whether the cavity works. Handle panels flat on battens, never on edge or bare ground. Cut outdoors or with extraction running and an H-class respirator on — silica dust is the one real health risk in this trade. Support both sides of the cut, and seal cut edges with the matching coating. An untreated edge wicks water and is the first place a facade looks tired. What fails six months later None of these are product faults. All of them are sequence decisions. What you see What caused it Cracks at panel corners Tight butt joints, no movement allowance Damp at the base Baffle missing, reversed or set too high Mould in the cavity Ventilation path blocked at head or base Rust streaks below screws Wrong screw type Coating blistering Cut edges and drilled holes left unsealed Walk the wall after the first rain, not the first month. Water leaves a trail within hours, and a stain you can still trace is a detail you can still fix. Every line in that table costs a day of scaffold time to put right. Which is why the sequence matters more than the speed, and why the first panel is worth an hour on its own. Request our installation drawing with your quotation — contact us and tell us the substrate, the elevation height and the wind or fire requirements your market applies.
How to cut fiber cement board
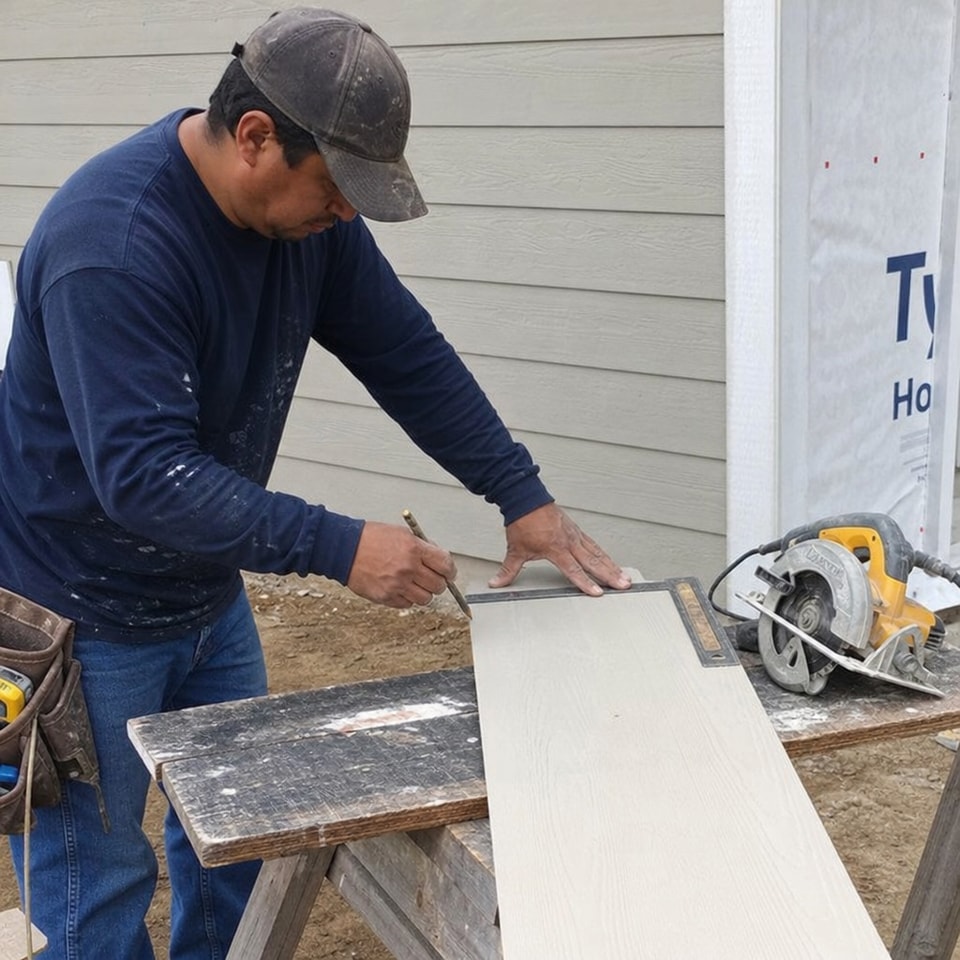
how to cut fiber cement board Fiber cement board is strong and stands up to weather. It is common for siding, outside cladding, soffits, and cement siding panels. To cut it cleanly, you need the right blade, good dust control, and solid support. Fiber cement board is denser and more rough than wood. This guide shows the best way to cut fiber cement board and how to cut cement fiber board siding with less dust, fewer chips, and less waste. How do you cut fiber cement board safely? You cut fiber cement board safely by holding the board up well, marking the cut line well, using a carbide or fiber-cement blade, and keeping dust down at the source. Dry cutting with a fast saw can make harmful dust, so work outdoors when you can. Wear a fitted respirator, eye protection, and hearing protection. Use dust extraction if your tool has it. For fiber cement board siding installation, plan cuts before you fasten the board. That way, each piece stays flat and can be trimmed without cracking. Before cutting, check the maker's instructions for the specific cement fiberboard you are using. Some panels have a smooth face. Others have wood, brick, stone, or other texture. If the board has a finished face, cut from the back when you can. That helps protect the visible side. Gather the right tools and materials The best way to cut fiber cement board depends on the cut. A circular saw works well for long straight cuts. Shears, a jigsaw, or a score tool can be better for small trims. If you are cutting larger cement siding panels, get help so the board stays steady. Useful tools and supplies include: · Fiber-cement circular saw blade or carbide blade with fewer teeth · Circular saw with dust control, or fiber cement shears for low-dust cutting · Jigsaw with carbide-grit blade for curves and notches · Straightedge, square, pencil, chalk line, and measuring tape · Flat workbench, sawhorses, or scrap board · Clamps to keep the panel from moving · Respirator, safety glasses, gloves, and hearing protection · Vacuum or approved dust collection system If you work with a board size like 3030x455x16 mm and a weight of 28 kg, plan your setup before you lift it. A panel that size can be awkward, even if the weight is fine. Poor support is one of the easiest ways to crack an edge. 1. Measure and mark the cut line clearly Start by measuring the opening, edge, or overlap where the board will go. Mark the cut line with a pencil or chalk line. Then check the measure again before you cut fiber cement board. It is better to check twice than to ruin a panel with a short cut. For siding, allow for required gaps, trim space, and expansion space based on the install guide for your product. If the board has a decorative face, mark the back side when you can. Still transfer key marks with care so the finished side lands right. Use a square for end cuts so the board fits cleanly against trim or nearby panels. 2. Support the board across its full length Place the cement fiberboard on a flat, stable surface before cutting. Long boards should be supported near both sides of the cut line so the offcut does not drop and tear the edge. If you use sawhorses, add plywood, foam board, or scrap strips under the board to cut shake. Clamping helps a lot when you cut narrow strips or trim textured cement siding panels. Do not tighten clamps too hard on the finished face. Use a scrap block to spread the pressure. The goal is to keep the panel still without crushing the texture or leaving marks. 3. Cut straight lines with a circular saw Can you cut fiber cement board with a circular saw? Yes. It is one of the most common ways to make long, straight cuts. Use a blade made for fiber cement cutting. Set the blade depth just a little deeper than the board. Move at a steady pace and do not force the tool. Cut with the back side up if that gives you a cleaner face on your material. Keep both hands on the saw. Stand out of the dust path. Let the blade reach full speed before it enters the board. If the saw slows, chips too much, or drifts, stop and check the blade and support. For cleaner results: · Cut slowly enough to limit edge blowout, but not so slowly that heat builds up. · Keep the saw base flat on the board during the cut. · Use a straightedge guide for long rips. · Replace dull blades; fiber cement wears blades faster than wood. · Vacuum dust from the work area instead of sweeping it into the air. 4. Use shears or scoring for low-dust cuts When dust control matters most, fiber cement shears can be a strong choice. They make less dust than a circular saw and work well for trimming siding pieces to length. The tradeoff is speed and edge quality. Shears can cut cement board with less dust, but they may leave a rougher edge, especially on thicker boards. A score-and-snap method can work for some thin cement board products, but not for every siding panel. Score the line a few times with a carbide scoring knife. Support the board close to the score, then snap down with even pressure. If the board resists or breaks unevenly, switch to a saw or shears instead of forcing it. 5. Make notches, holes, and detail cuts carefully For outlets, pipes, corners, and trim details, mark the cutout on the back of the board and drill starter holes at inside corners. A jigsaw with a carbide-grit blade works well for careful detail cuts. Keep the board supported near the cutout so the center piece does not shake and chip the area around it. Avoid sharp inside corners when you can, because they can become stress points. A drilled round spot at each corner helps reduce cracking and gives the jigsaw blade a smoother turn. Test-fit the piece before you fasten it, then make small changes instead of taking off too much. What should you do after cutting cement fiber board siding? After cutting cement fiber board siding, clean the edge, remove dust, and seal or finish the cut edge if the maker says to. Fresh cut edges can take in moisture more easily than factory-finished edges, so follow the coat, primer, or touch-up steps for your board. This matters most on open ends, butt joints, and spots near trim. If you use prefinished boards, protect the surface while you handle them. Some products use imported paint that can last up to 30 years, and some may also have an SGS certificate. Even so, cut edges and install damage should be handled by the supplier's guide. Wipe off residue with a clean cloth and avoid rough cleaning that could dull the finish. 6. Test-fit and fasten the panel correctly Place the cut panel in position before you add final fasteners. Check that edges line up, gaps stay even, and the grain direction matches nearby boards if the face has a wood, brick, stone, or similar pattern. A clean cut can still look wrong if the texture runs the wrong way. Fasten the board by the siding system rules, using the right nails or screws and the right spacing. Do not force a warped or tight piece into place. Trim it a little so it sits flat. Good fit lowers stress on the board and helps the finished job look professional. Common cutting mistakes to avoid Many cutting problems come from rushed setup, not from the cut itself. Fiber cement is tough, but it rewards steady handling and careful prep. Use this checklist before every cut: · Do not cut without a respirator and eye protection. · Do not leave the board unsupported on one side of the cut. · Do not use a wood blade if it chips, heats up, or dulls fast. · Do not ignore the finished face direction on textured panels. · Do not install a piece before sealing needed cut edges. · Do not sweep dry dust into the air after cutting. Final cutting tips for cleaner results The best way to cut fiber cement board is to match the tool to the job: circular saw for straight production cuts, shears for less dust, and jigsaw work for notches and curves. Keep the panel steady, cut from the side that best protects the finish, and control dust from the start. With patient measuring, the right blade, and careful edge care, you can cut fiber cement board cleanly and get it ready for a strong siding install.

Fiber Cement Board Test Data: Asbestos-Free, Strength & Water Absorption
Fiber Cement Board Test Data: Asbestos-Free Verification, Density, Water Absorption and Bending Strength Most fiber cement board datasheets are written by the seller, and plenty of them quietly reuse the same numbers from a competitor's page. We'd rather hand over the source. Our 16 mm exterior panel has been tested by two labs: SGS in Shanghai for asbestos content, and the National Center for Quality Inspection & Test of Building Engineering in Beijing for density, water absorption, bending strength, impact and thermal performance. Both reports are summarized below with their report numbers and dates, so you can verify them yourself. The second half explains what each figure means on a wall, and where the testing stops short. Who tested what, and when Report A Report B Laboratory SGS-CSTC Standards Technical Services (Shanghai) Co., Ltd.CNAS L0599, ILAC-MRA CABR Testing Center Co., Ltd. / National Center for Quality Inspection & Test of Building EngineeringCNAS L0230, MA 230002349837 Report No. SHAIN26003172701(SGS Job No. SHIN2602000357CM01) BETC-T4BC-2026-01542(Commission No. 2026-06079) Report date Feb 06, 2026 Sep 09, 2026 Product tested Non-asbestos fiber cement board, declared size 3000 × 453 mm Shengbaoqiang board, 3030 × 455 × 16 mm, 6 pcs Test scope Asbestos — six regulated minerals, PLM Density, water absorption, impermeability, saturated bending strength, impact, moisture deformation, thermal conductivity, warping, bending failure load Testing period Feb 02 – Feb 06, 2026 Aug 27 – Sep 09, 2026 Test basis AS 5370:2024+Amd 1:2025 GB/T 7019-2024, GB/T 30100-2013, GB/T 10294-2008, JG/T 396-2012, JC/T 2085-2011 Both are commissioned tests: we submitted the samples, the labs didn't pull them off a warehouse rack. That's how factory reports normally work, and it's exactly why you should ask any supplier how a report ties back to the batch you actually receive. Ours carry traceable sample IDs — SHA26-0031727-0001.C001 for the SGS sample, T4BC-2026-01542 for the CABR sample. Asbestos: what the scan actually covers Asbestos isn't one material. Six minerals are regulated, and a certificate that just says "asbestos-free" without naming them tells you almost nothing. Mineral CAS No. Unit Detection limit Result Chrysotile 12001-29-5 %(w/w) 0.1 Negative Actinolite 77536-66-4 %(w/w) 0.1 Negative Tremolite 77536-68-6 %(w/w) 0.1 Negative Amosite 12172-73-5 %(w/w) 0.1 Negative Anthophyllite 77536-67-5 %(w/w) 0.1 Negative Crocidolite 12001-28-4 %(w/w) 0.1 Negative All six came back negative at a detection limit of 0.1 %(w/w), which is 1,000 ppm on the report's own conversion (1 mg/kg = 1 ppm = 0.0001%). The lab also screened for unidentified mineral fibres (UMF) and found none. Watch for the detection limit whenever you read one of these reports. A "not detected" line with no MDL figure is unverifiable, because the method may simply not have been sensitive enough to catch a low concentration. Physical and mechanical results No. Test item Standard Result 1 Apparent density GB/T 7019-2024 §5.3 1.22 g/cm³ 2 Water absorption GB/T 7019-2024 §5.3 16.5 % 3 Impermeability GB/T 30100-2013 §16 No damp marks or water droplets on the specimen back after 24 h 4 Bending strength (water-saturated) GB/T 7019-2024 §5.7 8.6 MPa 5 Impact resistance GB/T 7019-2024 §5.9 No cracks on either face at the impact point 6 Moisture deformation JG/T 396-2012 Annex D 0.05 % 7 Thermal conductivity (mean 25 °C) GB/T 10294-2008 0.25 W/(m·K) 8 Warping after water absorption JC/T 2085-2011 §6.12 0.06 mm 9 Bending failure load JC/T 2085-2011 §6.6 2,457 N One footnote from the report matters when you compare suppliers: the bending failure load was measured on a 500 × 400 mm specimen loaded at 1,000 N/min, which puts failure between one and three minutes. A number from a different specimen size isn't the same measurement, so check the method note before you put two suppliers' figures side by side. Reading the numbers on a real facade Weight comes first. At 1.22 g/cm³, a 16 mm board works out to about 19.5 kg per square metre. One 3030 × 455 mm panel covers 1.38 m², so a dry panel lands near 27 kg, and our packing sheet quotes roughly 30 kg as shipped. That's a two-person lift, and it changes your fixing set-out before anything else on the drawing. Water absorption and impermeability answer different questions. The 16.5% absorption figure describes the board once it's fully soaked — the worst case. The 24-hour impermeability result describes what happens during a rain event, and that's the one that protects your wall. Design with the saturated bending strength of 8.6 MPa rather than a dry figure, because exterior cladding spends part of every year wet. Movement is small but real. Moisture deformation of 0.05% across a 3,030 mm panel is roughly 1.5 mm. That's the reason panels are fixed with a joint gap instead of butted tight against each other, and it's why sealant choice matters more than most installers expect. Treat this panel as a rainscreen, not insulation. At 0.25 W/(m·K), a 16 mm board gives you an R-value around 0.06 m²·K/W. That's negligible on its own. The thermal work belongs to the cavity and the rest of the wall build-up, so don't let anyone sell you a 16 mm panel as a thermal solution. One thing to keep in mind when you compare bids: density, absorption and bending strength move together. A 1.5 g/cm³ board will be heavier and stronger than this one, and it'll cost more per square metre for the same reason. Settle which grade the elevation actually needs before you argue about price per panel. The lighter board is the wrong pick for an exposed, high-wind coastal job, and the heavier board is money you didn't need to spend on an interior partition. Formats and surface textures Item Specification Panel size 3030 × 455 × 16 mm Coverage per panel 1.38 m² Panel weight approx. 30 kg as shipped Apparent density 1.22 g/cm³ Surface textures Wood Grain · Linear Stripe · Brick Pattern · Stone Grain · Grooved · Flat Available surfaces, each with a sample page: Wood Grain — warm timber look for residential and hospitality facades Linear Stripe — narrow repeating lines, hides joint rhythm on long elevations Brick Pattern — masonry appearance without the weight or the wet trade Stone Grain — rock-like texture for feature walls and entrances Grooved — deeper horizontal profiling, catches shadow across a facade Flat — smooth face for modern, minimal detailing and interior wall panel work Texture is a facade decision, not a catalogue one. Deep profiles such as Grooved read strongly in direct sun and hide minor alignment errors, but they also collect dust and organic growth in humid, low-rain-wash positions. Flat faces stay clean, yet every joint and fixing error shows. On coastal work we'd push you toward shallower profiles and more frequent cleaning access, not the deepest texture in the book. Most projects also come out better with one texture repeated across an elevation instead of three mixed on a single face. What these reports don't cover Neither report tests fire performance. If your project needs a fire classification, ask for the test to your market's standard instead of inferring one from these documents. They also don't cover coating durability — no accelerated weathering was run — and board data is not a system approval. Fixing type, substrate, cavity depth and wind load belong to the installation design. Finally, remember the bending result came from a 500 × 400 mm specimen in a lab. Panels on a frame, at full size, with real fixings, behave differently. The lab number is a material property, not a structural sign-off. And check which standard a result was produced under — a Chinese national standard result isn't automatically accepted by an Australian or North American reviewer, and the reverse holds true as well. Request the full reports We'll send the complete SGS and CABR PDFs with your quotation, including the sample IDs so your engineer can check the traceability. If you're specifying for a project, tell us the location, the elevation and the fire or wind requirements your market applies, and we'll confirm which report set applies to your order. Contact us · Tel / WhatsApp +8618260637322 · carl@sbqwallpanel.com
Where to Buy Fiber Cement Siding Online: Top Supplier
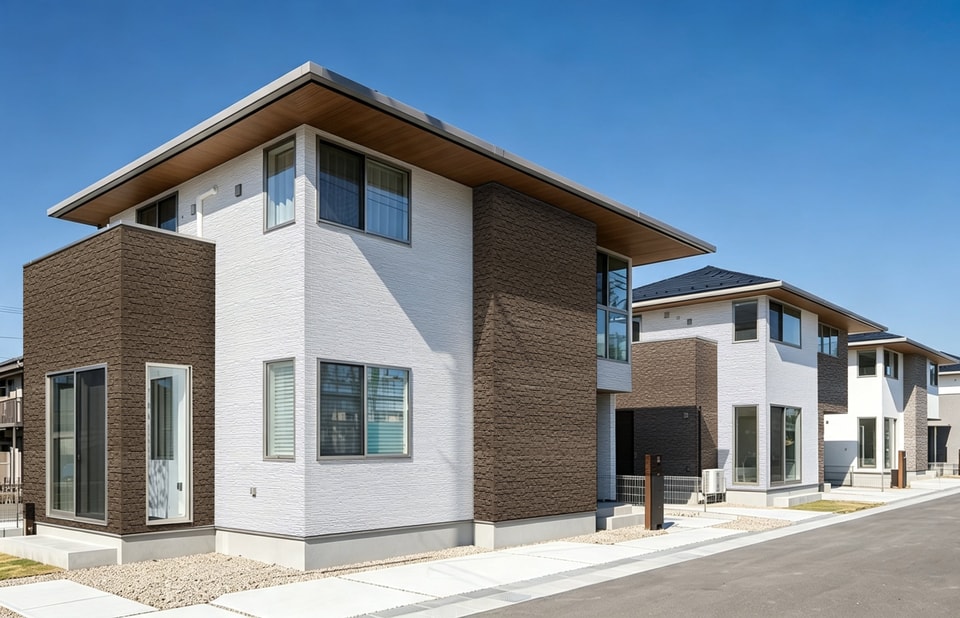
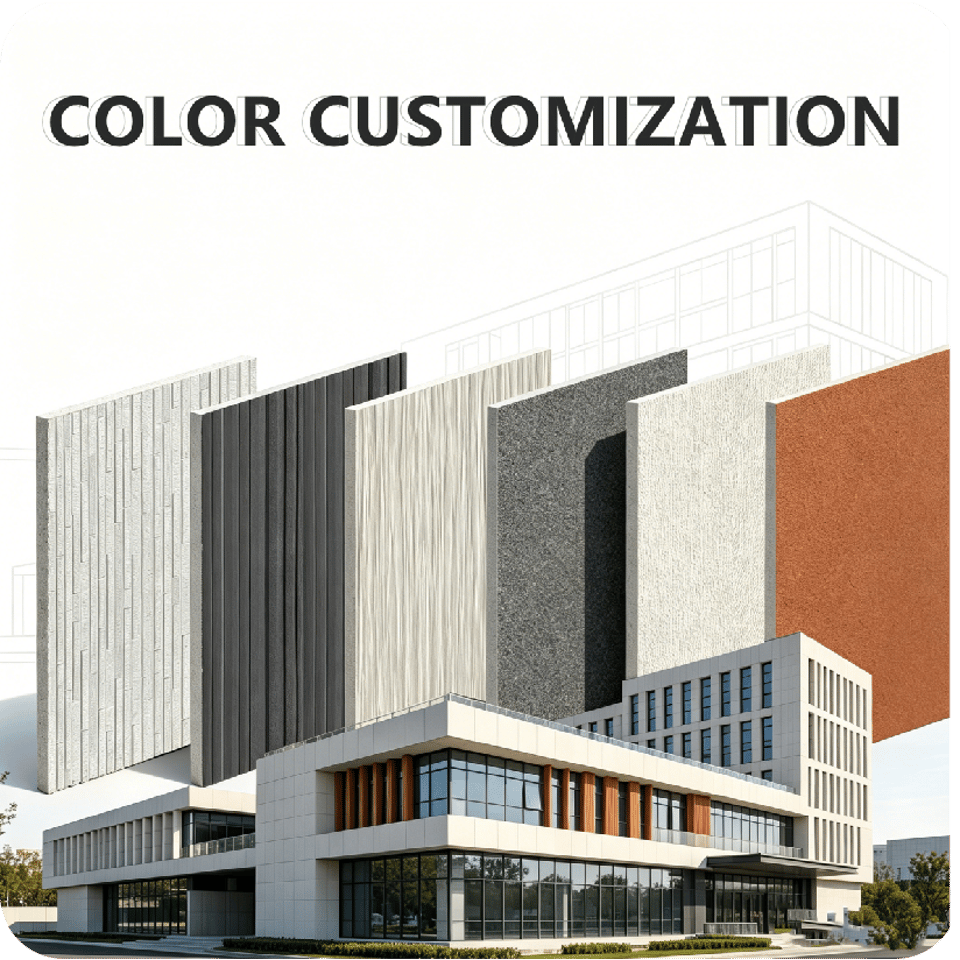
If you are looking for a reliable place to buy fiber cement, Shengbaoqiang (Jiangsu) Environmental Protection New Materials Co. offers fiber cement wall panels directly from a fiber cement board factory in China. If buyers need to purchase fiber cement boards, they can consult us. We offer a variety of models, shapes and patterns of panels to meet the diverse needs of customers. Color customization is supported. We welcome inquiries from individual property owners, builders, designers, agents, etc. Where should you buy fiber cement siding? The purchase of fiber cement boards depends on your project. No matter the size of the order, the factory will provide full support. From the shape of the product, the sample of the product, to the color of the product, the factory can offer assistance and will not treat customers differently based on the quantity of the order Factory supply for fiber cement wall panels When customers choose the exterior wall facade, they usually think of fiber cement exterior wall panels because they are maintenance-free and their surface can be self-cleaned by rainwater, saving a lot of maintenance and labor costs. Also, they are easy to install. For buyers, the multi-shaped exterior wall covering texture is also a factor to consider. After all, the factory has a price advantage and can reduce a lot of communication costs The specified product size is 303045516mm, making it suitable for panelized wall applications where consistent dimensions matter during planning. Before placing an order, confirm the intended installation area, quantity, texture preference, color direction, and whether the panels will be used for exterior cladding, feature walls, or broader facade work. Key product details include: · Product category: fiber cement siding / fiber cement wall panels · Factory: Shengbaoqiang (Jiangsu) Environmental Protection New Materials Co. · Factory location: Jiangsu,China · Product size: 303045516mm · Verification: products have SGS detection certification as a recognized third-party testing and verification standard · Support available: product design, color support, custom texture options Reasons buyers choose fiber cement siding Fiber cement wall panels are very popular because they offer a wide range of surface texture options, which do not rely on traditional wall choices. For many buyers, the appeal of this type of wall panel is practical: they hope that the wall panel as a whole looks very clean and tidy, is easy to install, and can be reused in the future to reduce their maintenance costs When discussing this type of fiber cement board, buyers usually make a comprehensive assessment from aspects such as surface texture, installation method, installation duration, and long-term applicability. Of course, in projects in damp coastal areas, commercial street facades, and private villa renovations, different guidance may be needed in terms of texture, fixation methods, and quantity planning. Choose fiber cement wall panels when you need: · A defined board size for planning wall elevations · Texture options that can support different architectural styles · Factory communication before purchase · Project-based supply rather than only retail packaging · SGS detection certification for added sourcing confidence Siding cost comparison starts with the whole project A useful siding cost comparison should include more than the board price. The lowest product price is not always the best final value if the material is difficult to coordinate, not suitable for the design, or creates installation delays. When comparing fiber cement siding with other siding materials, look at panel size, surface choice, cutting plan, accessories, shipping, installation labor, and the cost of replacing unsuitable products. For buyers who want to purchase siding online, it is helpful to request details before confirming the order. Ask for available textures, packing information, order process, lead time guidance, and whether the supplier can support your project type. If you are purchasing for resale or repeat projects, also ask about cooperation terms and product range. Before you compare quotations, prepare: 1. Project location and use case — exterior facade, interior wall, commercial project, residential renovation, or distribution stock. 2. Approximate area — wall area helps estimate quantity and reduce ordering mistakes. 3. Preferred appearance — wood grain, stone-like, flat modern, or other custom texture direction. 4. Panel specification — include the required size, such as 303045516mm. 5. Installation plan — confirm whether your installer has experience with fiber cement siding. 6. Documentation needs — request SGS detection certification information if your project requires verification documents. Simple siding installation tips for better planning Good installation starts before the panels arrive. Fiber cement siding should be planned with the wall structure, fixing method, joint layout, and edge treatment in mind. A clean drawing or elevation plan can help your supplier and installer understand how the panels will be arranged. Use these siding installation tips during project preparation: · Store panels on a flat, stable surface before installation. · Keep boards protected from unnecessary site damage before use. · Confirm cutting, drilling, and fixing methods with a qualified installer. · Plan visible joints in advance so the wall pattern looks intentional. · Check corners, openings, and transitions before final quantity confirmation. · Follow applicable local building requirements and professional installation guidance. These points are not a substitute for project-specific installation instructions, but they help reduce avoidable mistakes. If your design uses custom textures or a special wall pattern, contact the team before ordering so the product choice and installation plan can be reviewed together. How to buy fiber cement from the factory Buying from Shengbaoqiang (Jiangsu) Environmental Protection New Materials Co. is a straightforward sourcing process. Start by sharing your project type, required quantity, preferred texture, and whether you are buying for one project or seeking longer-term cooperation. The team can then provide consultation based on your intended use and product requirements. A typical inquiry may include: · “I need fiber cement siding for an exterior wall project.” · “The preferred size is 303045516mm.” · “Please share available textures and custom texture options.” · “Do the products have SGS detection certification?” · “Can you support project supply or cooperation for fiber cement wall panels?” This gives the team enough context to respond with more useful information. It also helps avoid vague pricing discussions before the actual project scope is understood. Request consultation and cooperation details If you are deciding where to buy fiber cement siding, contact Shengbaoqiang (Jiangsu) Environmental Protection New Materials Co., a fiber cement board factory in China, for direct product support. The team can help with product consultation, project support, custom texture options, SGS detection certification information, and cooperation details for fiber cement wall panels. Reach out with your project size, desired appearance, and order goals, and ask for guidance before you purchase. Whether you need panels for one building or want to discuss ongoing supply, a clear consultation is the best next step toward choosing the right fiber cement siding.
Fiber Cement Siding: Expansion & Maintenance Tips
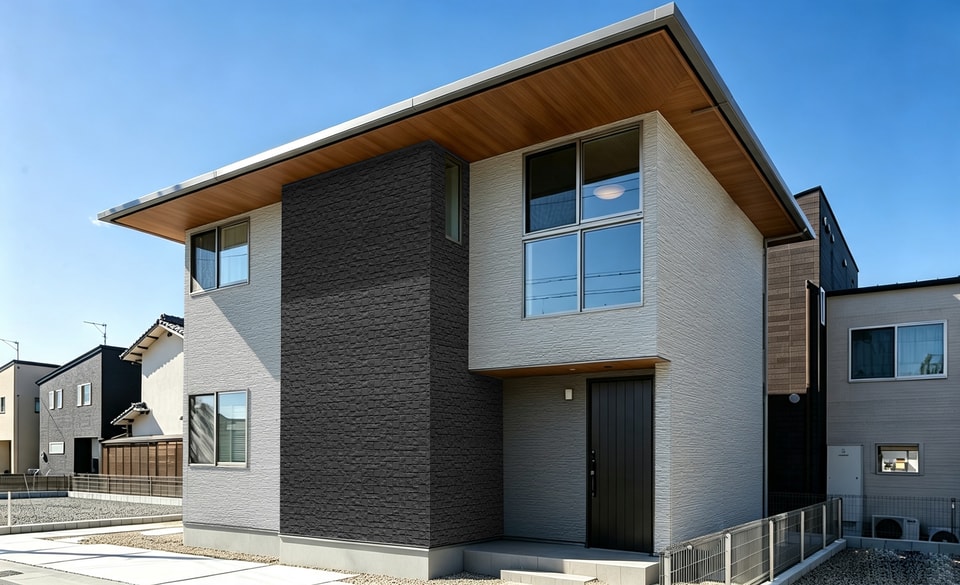
Fiber cement siding is known for being stable, durable, and lower maintenance than many exterior materials, but it is not completely motionless. Like most building products, it can expand and contract slightly as temperature, moisture, and installation conditions change. Understanding that small movement helps homeowners plan better siding installation, avoid preventable gaps or cracking, and keep fiber cement house siding looking clean over time. Does fiber cement siding expand and contract? Yes, fiber cement siding does expand and contract, but typically less than materials such as vinyl or natural wood. The movement is usually modest because fiber cement board is dense and dimensionally stable, yet weather effects still matter. Heat, cold, humidity, rain, and drying cycles can all create slight shifts, which is why proper clearances, fastening, and caulking details are important during fiber cement board siding installation. This does not mean fiber cement siding is unreliable. It means the siding board needs room to perform as intended. When installers ignore spacing guidance or seal joints incorrectly, normal movement can become visible as buckling, cracked caulk, open seams, or stress around trim. What is fiber cement siding? Fiber cement siding is an exterior cladding made from a blend of cement, sand, cellulose fibers, and other additives. It is designed to resemble painted wood siding, shingles, or panels while offering strong resistance to rot, pests, and general weather exposure. You may also hear it described as cement board siding, fiber cement house siding, or a cement board wall system when used in panel-style applications. Its composition is what gives it strength and stability. The cement content helps it resist impact and decay, while the fibers add reinforcement. However, because it still responds to moisture and temperature, it should be treated as a building material that needs correct installation, not as a product that can be forced tightly into place. Expansion joints and spacing protect the siding Expansion joints are planned gaps or transitions that allow siding materials to move without pushing against nearby boards, trim, or walls. With fiber cement siding, these details are especially important at butt joints, corners, window trim, doors, and long wall runs. The goal is not to leave obvious openings, but to create controlled spaces that can be flashed, caulked, or covered according to the product’s installation guidelines. A good siding installation should account for: · Manufacturer spacing requirements at board ends, trim, and penetrations. · Proper flashing behind joints so water is directed away from the wall. · Compatible caulk or sealant where sealing is required. · Correct fastener placement so boards are secure without being overdriven. · Room for drainage and drying behind the siding where the wall assembly requires it. These details are small, but they make a major difference in long-term appearance and performance. Weather effects that homeowners should watch Weather effects can show up gradually. In hot climates, repeated sun exposure may emphasize minor expansion at seams. In cold regions, contraction can make gaps more noticeable if joints were not handled properly. In wet or humid areas, moisture management becomes especially important because trapped water can affect paint, caulk, and the wall behind the siding. Seasonal movement is not always a problem by itself. What matters is whether the siding returns to a stable position and whether joints remain sealed or protected. If you notice recurring gaps, swollen edges, cracked caulk, loose boards, or paint failure, it may be time to inspect the installation details rather than simply repainting. Siding maintenance helps prevent bigger issues Routine siding maintenance is straightforward, but it should be consistent. Wash dirt and mildew from the surface, keep plants trimmed away from the wall, and check joints after harsh weather. Look closely around windows, doors, corners, and any place where a siding board meets trim. A simple annual checklist includes: 1. Inspect caulked joints for cracking or separation. 2. Confirm gutters are moving water away from the siding. 3. Touch up damaged paint where the coating has been broken. 4. Check that boards are not pressed tightly against roofs, decks, or hard surfaces. 5. Call a qualified siding professional if boards are warped, loose, or repeatedly opening at seams. The practical takeaway So, does fiber cement siding expand and contract? Yes, but usually in small, manageable ways when the product is installed correctly. The best protection is a combination of proper expansion joints, careful fiber cement board siding installation, and regular maintenance. With the right details in place, fiber cement siding can remain attractive, stable, and protective through changing seasons.
Building Materials Siding Fiber Cement Siding
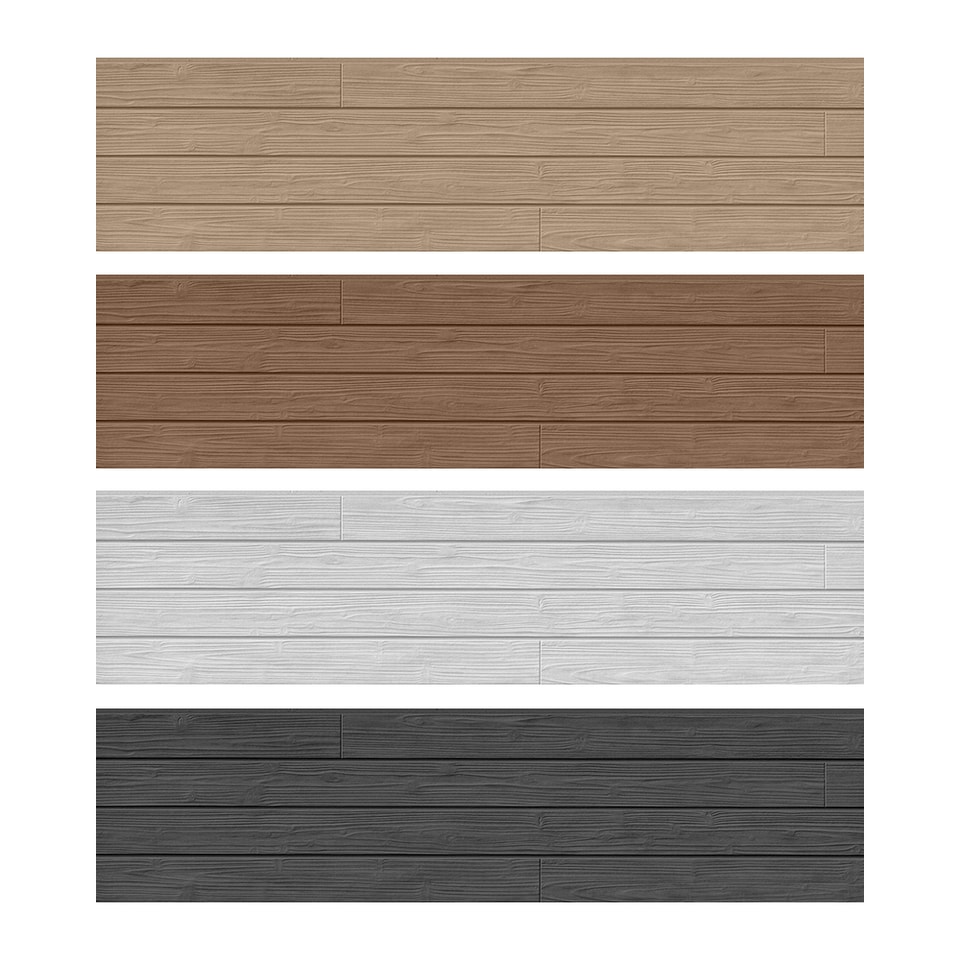
Fiber cement siding is a practical exterior cladding choice for projects that need strength, stable appearance, and dependable weather protection. In the Building Materials Siding Fiber Cement Siding category, it stands out because it can support classic lap siding, cement fiber shingle siding, exterior wall panels, and coordinated trim details without relying on wood as the main surface. This guide explains where it fits, how it compares with other materials, and what to consider before installation. Why are builders choosing fiber cement siding? Builders choose fiber cement siding because it offers a strong balance of durability, design flexibility, and low routine maintenance. It is made to handle exterior exposure while giving homeowners, developers, and contractors a broad range of profiles and finishes. For many projects, that makes it one of the more durable siding options when the goal is a long-lasting façade with a clean architectural look. Fiber cement is often selected for homes, townhouses, commercial buildings, garden structures, and renovation projects where the exterior needs to look finished without feeling fragile. It can be used to create traditional horizontal lines, shingle-style texture, or a more modern panelized wall system. One available fiber cement exterior wall panel size specification is 303045516mm, which can be useful when planning elevations, estimating coverage, and coordinating installation layouts. A further benefit is material confidence. The factory holds an SGS 100% asbestos-free test report, and the factory is E0 environmentally friendly. For buyers looking for eco-friendly siding, those details support safer material selection and help project teams make more informed purchasing decisions. Fiber cement as a weather-ready exterior material A good siding system should do more than cover a wall. It should help protect the structure from rain, sun, temperature changes, and everyday wear. Fiber cement is valued as weather-resistant siding because it is dimensionally stable compared with many natural materials and can be finished for a wide range of climates and design needs. This matters in real projects because exterior cladding is constantly exposed. Wind-driven rain, heat, humidity, freezing conditions, and UV exposure can quickly reveal weaknesses in lower-quality materials. Fiber cement does not make a building maintenance-free, but it gives contractors a dependable base material when proper flashing, fastening, sealing, and painting practices are followed. Design flexibility is another advantage. Fiber cement siding trim can be used around windows, corners, doors, fascia areas, and transitions to create a finished look. When trim and siding are planned together, the exterior feels intentional rather than assembled from unrelated pieces. Fiber cement siding versus vinyl siding: what should you know? Fiber cement siding versus vinyl siding comes down to priorities: fiber cement generally appeals to buyers who want a heavier, more rigid exterior with a painted architectural finish, while vinyl often attracts projects focused on lightweight handling and lower upfront simplicity. Neither option is right for every job, so the best choice depends on budget, design goals, installation conditions, and maintenance expectations. Use this siding comparison guide to frame the decision: Factor Fiber cement siding Vinyl siding Appearance Painted, solid, often closer to wood or masonry-inspired profiles Broad color range, typically lighter visual weight Durability focus Strong surface, good for long-term exterior performance Flexible and lightweight, but can be more vulnerable to impact or heat distortion Design options Lap, panel, trim, and siding comparison guide siding comparison guide styles Mainly lap-style profiles with accessories Maintenance Periodic cleaning and repainting when needed Cleaning and occasional panel replacement Installation Requires careful cutting, fastening, sealing, and handling Usually faster and lighter to install Many fiber cement reviews focus on the same tradeoff: it can deliver a premium, durable exterior, but it rewards careful planning. The product itself is only part of the result. The quality of the installation, the coating system, and the wall assembly all influence how well the siding performs over time. Cost and installation planning matter Fiber cement siding installation cost varies by project size, wall complexity, local labor rates, finish selection, trim package, and whether old siding must be removed. Because these variables can shift significantly, it is better to request project-specific quotes than rely on a generic number. A simple rectangular wall will usually be easier to estimate than a multi-story exterior with many corners, windows, penetrations, and decorative details. When budgeting, consider more than the board or panel price. Include accessories, fasteners, flashing, sealants, paint or coating, waste allowance, delivery, equipment, and labor. If the project uses larger panels or specialized profiles, handling and layout time may also affect the final estimate. Practical siding installation tips include: · Confirm the wall is ready. Sheathing, moisture barriers, flashings, and openings should be prepared before siding begins. · Plan the layout. Align seams, corners, trim, and panel spacing before cutting material. · Use appropriate tools. Fiber cement requires correct cutting equipment and dust-control practices. · Follow fastening guidance. Fasteners must suit the substrate, exposure, and manufacturer instructions. · Protect edges and joints. Seal or finish cut edges where required, and keep water-management details consistent. · Coordinate trades. Electricians, plumbers, window installers, and painters should not damage completed siding work. For larger or more technical projects, experienced fiber cement siding contractors are often worth the investment. They understand clearances, joint treatment, panel handling, and finishing details that can affect long-term performance. Structural details, trim, and shear considerations Fiber cement siding is primarily an exterior cladding, but project teams may still discuss fiber cement siding shear when evaluating wall performance, fastening patterns, and overall assembly design. Shear strength depends on the complete wall system, not just the visible siding surface. That means engineers, architects, or qualified building professionals should confirm structural requirements when wind loads, seismic conditions, or code compliance are part of the project. Trim details also deserve early attention. Corners, window surrounds, starter areas, and roofline transitions are where moisture problems often begin if the assembly is rushed. Good fiber cement siding trim helps define the design, but it also supports cleaner terminations and better water shedding when installed correctly. If the design includes cement fiber shingle siding, installers should pay special attention to alignment and exposure. Small errors can become visible across a broad elevation, especially on front façades or gable ends. A measured layout and consistent reveal can make the difference between a professional exterior and one that looks uneven. Painting and long-term care Painting fiber cement siding is one of the main ways to control both appearance and protection. Some products may arrive primed or prefinished, while others require field coating. In either case, paint quality, surface preparation, weather conditions during application, and proper edge treatment all affect the finished result. Routine care is usually straightforward. Wash dirt and debris from the surface, inspect caulked joints, watch for damage near ground level, and repaint when the finish begins to wear. Avoid treating siding as a stand-alone waterproofing layer; the wall assembly behind it still needs proper moisture management. A simple maintenance checklist includes: 1. Inspect siding and trim at least seasonally. 2. Keep landscaping from rubbing against the wall. 3. Clean with gentle methods rather than aggressive blasting. 4. Repair cracked sealant or damaged paint promptly. 5. Recoat according to the finish system and exposure conditions. A smart choice when performance and appearance both matter Fiber cement siding is a strong option for projects that need a polished exterior, reliable weather performance, and flexible design choices. It works well when buyers want durable siding options without giving up the character of lap boards, panels, shingles, or coordinated trim. The best results come from matching the material to the building, climate, budget, and installer skill. Review specifications, ask about test reports, compare finish options, and work with qualified fiber cement siding contractors when the project demands precision. With the right planning, fiber cement can be a dependable exterior solution for both practical protection and lasting curb appeal.
Is Fiber Cement Board Waterproof for Outdoor Use?
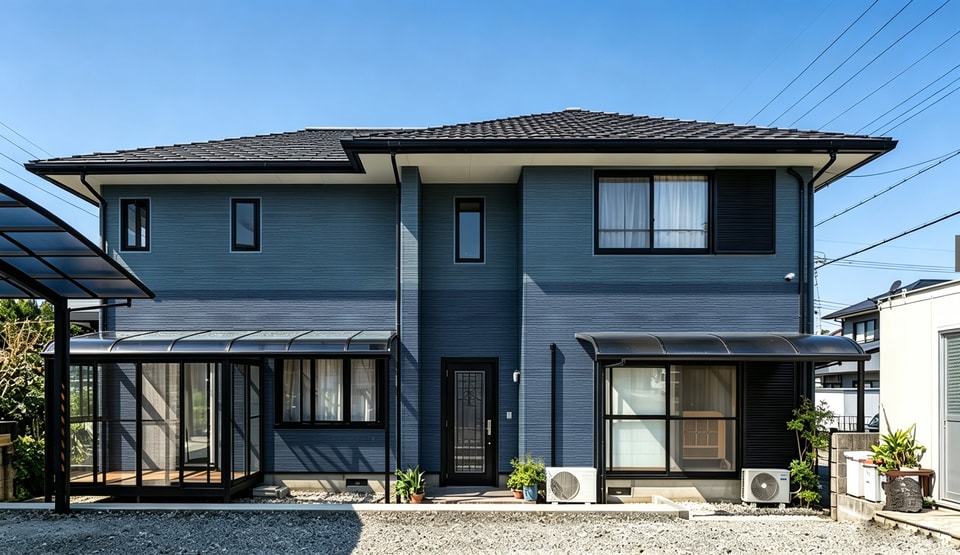
No, it's water-resistant. The two words get used interchangeably, and the difference is why some fiber cement walls still look new years later while others have peeling paint and soft trim around the windows. "Waterproof" sells better, so plenty of pages use the stronger word anyway. Then the board shows up on site, everyone treats it like a plastic sheet, and the details that were supposed to keep water out of the wall never get built. Wall failures are slow, so nobody notices for a while. Water-resistant and waterproof are not the same promise A waterproof material blocks water from getting through it. Membranes and sheet metal do that. A water-resistant material survives getting wet: it sheds most of what lands on it, and dries out without falling apart. Fiber cement is in the second group. It's cement, cellulose fibre and mineral filler. It won't rot, termites ignore it, and it doesn't swell and crumble the way some wood-based products do after a wet season. What it will do is absorb water at a raw cut edge or a fastener hole, hold it a while, and release it when things dry out. The job was never to make the board immune to water. It's to keep water off the face and out from behind the panel. So when a supplier tells you their fiber cement board is waterproof, ask what test that claim rests on. A cementitious board doesn't block water, it tolerates water. Those are different promises, and the second one comes with instructions attached. Where water actually does the damage Rain on a vertical wall isn't the problem. The face sheds it. Trouble shows up at the details, and in a fairly predictable order. Cut edges go first, because the core is more absorbent than the factory face. Fastener holes come next; every screw is a small penetration through the protective skin. Then the joints, corners and transitions, where two materials move at different rates. After that you're into the places where water stops moving altogether. The bottom of a wall inside the splash zone. A horizontal trim acting as a shelf. A drainage cavity blocked by mortar or insulation, so the wall can't drain and can't dry. Anywhere the cladding meets soil, a deck or a roof. The board is usually the last thing to fail. Paint goes first, then the sealant, then the fasteners, then the sheathing and framing behind the wall. By the time the cladding looks bad, the wall has been wet for a long time. Blaming the panel for a moisture problem usually means blaming the wrong component. Where fiber cement works outdoors, and where it doesn't Fiber cement earns its place outside because it behaves like masonry at the surface and handles like a panel on site. It gets specified most often on projects where timber cladding would spend its life fighting the weather. Lap siding, when a traditional profile is wanted Vertical siding and board-and-batten Large panels on modern facades, accent walls and commercial elevations Soffits and fascia, where the product is rated for the location and air can move behind it Exterior trim at windows, doors and corners, with joints sealed as specified Then the other list. Fiber cement doesn't replace a waterproofing membrane when the assembly needs one. Showers and wet rooms, surfaces that hold standing water, anything below grade or in contact with the ground: that's outside the job of a standard exterior board. A better question than "is this board waterproof" is what it's being asked to do. Rain on a vertical wall, splashback at the base of the wall, wind-driven rain, standing water and interior vapour are five different problems, and the assembly only has to solve the one you have. Situation Does fiber cement work? What the assembly still needs Vertical exterior wall Usually yes Weather barrier, flashing, finished coating Cut edges and penetrations Only if treated Sealant, primer or approved edge treatment Near soil, decks or paving Yes, with clearance Keep the required gap, stay out of the splash zone Wet rooms and showers Product-specific A waterproof membrane is often required Flat surfaces holding water Usually no A genuinely waterproof material The more the water moves, the less the detail has to do. Water that sits has to be designed around. If your project lands in the last two rows, change the product rather than the sealant. Flashing, sealant and coating do three different jobs These get bundled together as waterproofing. They aren't interchangeable, and none of them substitutes for the others. Paint or a factory finish protects the exposed surface and slows how much moisture the board takes up. Sealant closes the joints the manufacturer tells you to seal, and nothing else. Flashing intercepts water at a penetration or a horizontal transition and sends it back outside: head flashing over a window, kick-out flashing where a roof meets a wall, pan flashing at a sill. The water-resistive barrier behind the cladding is the last line, protecting the sheathing and framing if something does get past the board. The common mistake is treating sealant as the main defence. Caulk shrinks, cracks and pulls away as materials expand and contract, and when it finally lets go there's nothing behind it. A well-detailed wall still drains after a joint fails. That's the difference between a repair and a rebuild. And use a system. The primer, coating, fasteners and sealant the board's instructions call for were chosen to work together. Mixing whatever is on the truck turns a system into a pile of unrelated parts. Backer board isn't siding This one wastes a lot of money. Tile backer board and exterior siding are two different product categories, even when they look similar on a shelf. Backer board is a substrate. It's meant to be covered by tile and, in wet areas, by a membrane. An exterior panel is meant to face weather directly. Inside the fiber cement family you'll find boards that are moisture-resistant, boards that need a separate membrane in wet areas, and boards never intended for long-term outdoor exposure. Read the datasheet and look for four things: approved uses, exposure limits, finishing requirements, and whether the board is rated for exterior installation. If it doesn't say the product is approved for what you're doing, careful work around it won't fix that. Picking on price per sheet is how this goes wrong, because the cheaper board in the same aisle may be the one that isn't rated for your wall. Installation details that keep the wall dry None of this is difficult. All of it is easy to skip, and none of it is visible once the wall is closed. Store boards dry and off the ground. Use the fasteners and spacing the manufacturer specifies. Leave the gaps required at joints, corners and abutments. Prime or seal cut edges where the instructions say to. Flash over penetrations and horizontal transitions. Keep the cladding clear of roofs, decks, soil and paving. Stay ahead of the finish instead of waiting for it to fail. The numbers aren't universal. Gap sizes, clearance above grade and edge treatment differ between products, so work from that product's installation manual rather than a rule of thumb from a different board. Three questions are worth asking before you order: which exposures the board is rated for, how cut edges and penetrations should be treated, and what the clearances are in your application. Get those answers from a datasheet and an installation manual, not from a product page.
Fiber Cement Cladding Factory Direct: Specs, Supply and What to Check Before You Buy
Most fiber cement cladding enquiries we answer in Nantong start the same way. An architect has drawn a rainscreen facade. A contractor has priced it. The imported panel that was specified comes back at a number the client will not sign, and suddenly everyone is looking for a factory that can match the performance without gambling on the certificate, the fire rating or the shipping date. We are SBQ (ShengBaoQiang). We make fiber cement exterior cladding in our own plant in Nantong, Jiangsu, and export orders ship FOB from Nantong port. What follows is the information buyers actually ask for in their first two emails: what the panel is made of, what has been tested, how the system installs, how an order moves through production, and where a factory-direct panel genuinely differs from Nichiha, KMEW or James Hardie. If you specify or import facade material, treat this as the checklist version. Why the asbestos question comes first We put this at the top of the datasheet for a reason. Asbestos cement was used in cladding for most of the last century, so buyers in Australia, Europe and North America now treat the material name itself as a warning light. Importers have told us their customs brokers ask for the test report before they will even quote duties on a container. SBQ fiber cement cladding is 100 percent asbestos-free, and we would rather you verified that than believed it. The raw mix is cement, cellulose fibre, silica powder and mica. No asbestos, no formaldehyde, low radiation. An independent SGS laboratory test report is available for tender submissions, customs clearance and project documentation, and we will send the digital copy on request. If your client's specification calls for a physical document in the project file, hard copies can follow by courier. The same material profile is usually what carries a panel through the environmental section of a green building submission: mineral fillers and cellulose fibre instead of petrochemical binders, and a finished board with no added formaldehyde. If your client is working to a particular green rating system, tell us which one and we will tell you plainly which requirements the panel meets and which are decided by the rest of the wall build-up, not by the cladding. What an A1 non-combustible rating means on site Fire performance is where cheap facade material gets found out, and it is the first line most specifiers highlight before they open a price file. A1 is the top reaction-to-fire classification. A panel in that class does not feed flame spread and releases negligible heat when exposed to fire. For high-rise residential, hotels, schools and other public buildings, that classification is frequently written straight into the specification, which means a supplier without the documentation is not in the conversation at all. In bushfire-prone parts of Australia the requirement tightens further, and the cladding is assessed as part of the whole wall assembly rather than on its own. One caveat worth stating clearly, because it comes up on almost every project: fire classification is product and build-up specific. If your project needs a certificate for a particular thickness, surface or complete assembly, ask us for the document that matches the panel you are actually ordering, and check it against your local code before sign-off. We would much rather answer that question three weeks before the order than three weeks after it. The self-clean coating, and what to expect after year five The surface finish on SBQ panels is a photocatalytic hydrophilic coating. In plain terms: sunlight activates the surface, rainwater spreads into a thin film instead of beading into droplets, and that film carries dust down the face of the panel instead of leaving it to bake into vertical streaks. On a facade that faces a road, an airport or any dusty environment, that is the difference between a building that still looks new at year five and one that is already being scheduled for repainting. The coating is also what sits behind our colour retention figure. SBQ panels are specified for 15-year colour retention with strong UV resistance, which is the practical answer to the question buyers ask about sunny, high-radiation markets: does the wood grain or the stone tone still read as intended once the building has been through several summers. We will not tell you the panel is maintenance free, because no exterior cladding is. Runoff still leaves mineral deposits around horizontal trims and in sheltered reveals, and in coastal locations salt spray is worth rinsing off periodically. What the coating changes is frequency. It reduces cleaning cycles and pushes back repainting, and on a large facade that shows up in the maintenance budget rather than in the showroom. Textures, sizes, and how custom work actually runs The range covers wood grain, stone texture, brick pattern, linear engraved and plain flat panels, with custom colour matching for project-specific facade design. The standard board is 3030 x 455 mm, in 16 mm and 18 mm thicknesses. The 16 mm panel in that size is the one we keep in stock. Custom orders are the other half of what we do, and custom work is genuinely done in-house rather than outsourced: our own R&D team develops textures, colours and sizes for a project instead of quoting from a fixed stock list. That is the part of the business most importers tell us they cannot get from an agent representing a foreign brand, where a non-standard colour means a change request travelling overseas. Be realistic about the trade-off, though. A new texture or a matched colour adds tooling and approval steps, and the first sample board is where most of the calendar time goes. Build that into your programme rather than assuming a custom panel moves at the same speed as a stocked one. Send us a reference photo or a physical sample and we will tell you honestly whether your target texture is achievable on a fiber cement substrate or better matched by a different material entirely. Weather performance: density, water absorption and the 30-year figure The relevant numbers for a facade panel are density and water absorption, because between them they decide how the board behaves through years of wet and dry cycles. SBQ panels have a density of at least 1.2 g/cm3 and low water absorption. In practice that means the board does not hold moisture, which is what stands behind the rest of the performance list: termites have nothing to eat, mould and rot need sustained moisture that the panel does not retain, and freeze-thaw cycles do not crack a board that never became saturated. Dimensional stability is the point that matters most in humid, coastal and hot climates, where lesser materials move, bow or telegraph their fixings through the surface. Design service life is stated at 30 years or more. That figure is a design assumption rather than a warranty, and it is worth being precise about why. It assumes a correctly prepared substrate, a ventilated cavity that is kept open, clips of the right corrosion class for the location, and sensible maintenance. Get the fixing details wrong on any rainscreen system and the best panel on the market will fail at the fixings first. This is the part where we would rather spend an extra email with your installer than an extra month on a defect claim. Installation: the clip-lock rainscreen system SBQ panels install on a dry clip-lock system with concealed clips, into the same drained and ventilated rainscreen logic used by Nichiha and KMEW systems. A crew that has already installed Japanese fiber cement cladding can start on SBQ panels without a retraining day, and that matters more than it sounds on a programme where the facade crew is the bottleneck. The concealed clip connection also allows a controlled amount of movement between panel and substructure. That helps under seismic load and takes up thermal expansion without stressing the board, which is why this system keeps appearing on tall buildings in active zones rather than a face-fixed alternative. For the assembly to perform, you need the whole set rather than the panel alone: starter and base trims, corner profiles, water drip trim, flashing and coping. Buying those from a different supplier is usually where a facade gets into trouble, because trims that were not designed against the same panel dimensions do not line up the way the drawings assume. We manufacture the accessories alongside the panels, on the same tolerances, so the system arrives as a system. The installation drawings we send with an order cover the clip spacing and the cavity detailing your installer will ask about. SBQ compared with Nichiha, KMEW and James Hardie The useful comparison here is not who makes the better board. All four are fiber cement, and all four carry an asbestos-free position. What buyers actually feel is the supply model behind the panel: how it is priced, how far it can be customised, how fast documents and accessories arrive, and who answers the phone when an installer has a question on site. SBQ Nichiha / KMEW James Hardie Asbestos status 100% asbestos-free, SGS report supplied on request Asbestos-free Asbestos-free Reaction to fire A1 non-combustible A1 per manufacturer data A2 per manufacturer data Surface finish Photocatalytic self-clean coating, 15-year colour retention High-performance factory coating ColorPlus factory pre-finish Custom texture and colour Developed in-house, sample-first, moderate cost Limited custom programmes, higher change cost Limited profile range Supply route Direct from our factory, FOB Nantong Imported, agent and distributor network Imported, distributor network Accessories Flashing, coping, water drip trim, corner profiles from the same factory Available separately, priced separately Mostly lap siding profiles, limited matching trims Price position Factory price, no brand or agent layer Brand premium Brand premium Technical support Factory technical team, direct Through the local agent Through the local distributor Two things are worth saying about that table. First, fire classifications and coating systems are summarised from each brand's published information, so verify them against the manufacturer's current datasheet before you write them into a specification. Second, the imported brands earn their position. They have decades of published project references and a level of brand recognition that removes some explaining from a tender in certain markets. If recognition is the deciding criterion on your project, buy the brand. Where a factory-direct panel wins is elsewhere: cost, customisation, accessory completeness and response time on non-standard requests. On a project where the client wants a specific texture, a matched colour or a full trim package arriving in one container, the difference between a factory and a distributor is most of the programme. Inside the Nantong factory: capacity, QC and what holds up a delivery Our plant sits in Nantong, Jiangsu, close to Nantong port, which is why FOB Nantong is the term we quote. Production runs on fully automated lines with the annual capacity to take large overseas construction orders rather than only sample-scale business. Quality control is in-house and staged rather than only final: incoming raw material batching, autoclave curing, surface coating, then finished panel inspection before packing. Each of those checkpoints catches a different failure. Batching errors show up as inconsistent density, curing problems show up as dimensional movement, and coating defects are the ones a buyer will spot on the first pallet opened on site. Lead time is the question that decides most orders. Mainstream 3030 x 455 mm 16 mm panels are held in stock, so those orders can be packed and loaded without waiting for a production run. Custom orders move to a production schedule, and we would rather give you a date at quotation stage that we can actually hold than a short one that costs you a crane crew. Because panels and accessories come off the same site, customers do not have to source flashing, coping, water drip trim and corner profiles from a second supplier and hope the dimensions agree. Sales are direct from the factory with no middle agent in the chain, so there is no brand premium layered onto the FOB price. Bulk export orders ship to Australia, Southeast Asia, the Middle East and North America. Where SBQ cladding gets specified Luxury villa facades are the most common single-family use, and usually the smallest order we ship. Commercial buildings, hotels, schools and exhibition halls are where the volume sits, and where the decision is driven by fire class, the joint line across a large flat elevation, and whether the accessory set lands with the panels. Industrial parks and town renovation projects bring a different requirement: repetition. When the same elevation is repeated across a dozen blocks, colour consistency between production batches stops being a detail and starts being the reason a client rejects a delivery, which is why batch tracking runs through our QC stages. Retrofit and rainscreen over-cladding is the application where the accessory range earns its place. Existing buildings rarely offer clean, square openings, and the flashing and trim set is what lets an installer close the detail around an opening that was never built for a ventilated facade. Because the panels are light relative to masonry or stone and go on dry, over-cladding a live building usually avoids the wet trades that push a renovation programme out by weeks. Questions buyers ask before ordering Can I get your SGS asbestos-free certificate? Yes. We provide the official SGS asbestos-free test report for project tenders and customs inspection. Send us the project details and we will share the digital copy; if the specification requires a physical document, hard copies can be sent on request. Can you provide samples? We offer free panel samples so your client can check texture, colour and mass in their own light. The buyer covers the courier freight. A sample in the client's hand settles more specification arguments than any brochure. What sizes and thicknesses do you keep in stock? The standard board is 3030 x 455 mm. The 16 mm panel in that size is the stock line; 18 mm runs to order. Custom sizes are possible through the R&D team, with the lead time that implies. What is your delivery term? FOB Nantong for export orders. We arrange pallet packing and container loading, and we will confirm how the order should be palletised for your destination before production starts, since pallet configuration affects the loaded cubic metres. Does your cladding install the same way as Nichiha? Yes, it is a clip-lock dry installation on the same rainscreen principle. An installer who has worked with Japanese fiber cement cladding can install SBQ panels directly without extra training, and our installation drawings cover clip spacing and cavity detailing for the crew. Get the documents before you decide on a price If you are specifying or importing, the fastest way to test whether we are a fit is to ask for documents rather than a quote. Tell us the project: location, building type, facade area, target texture and thickness, and whether you need the accessory set shipped with the panels. We will come back with the SGS asbestos-free report, the technical datasheet for the exact board you are considering, and free panel samples so your client can judge the finish in their own light. You cover the courier on the samples. We cover the rest. If you are already pricing against an imported panel, send us that specification too. Comparing two documents line by line tells you more than comparing two unit prices, because thickness, coating system and accessory scope are rarely identical between a factory quotation and a distributor quotation. Where our board is a genuine match for what you specified, we will say so. Where it is not, we will say that as well, and it is better to hear it before you commit than to find out at the first site inspection.
Contact Us